Showing posts with label skulls. Show all posts

Friday, June 6, 2014

Smeared Fringe

Greetings!
I am here to share my weekly make for Smeared Ink.
I always need blank note cards, or a blank all occasion card,
but always seem to have used my last one already.
So, I decided that now would be a good time to add to my
stash of blank cards.

I have used two of the images from the versatile set of digis named,
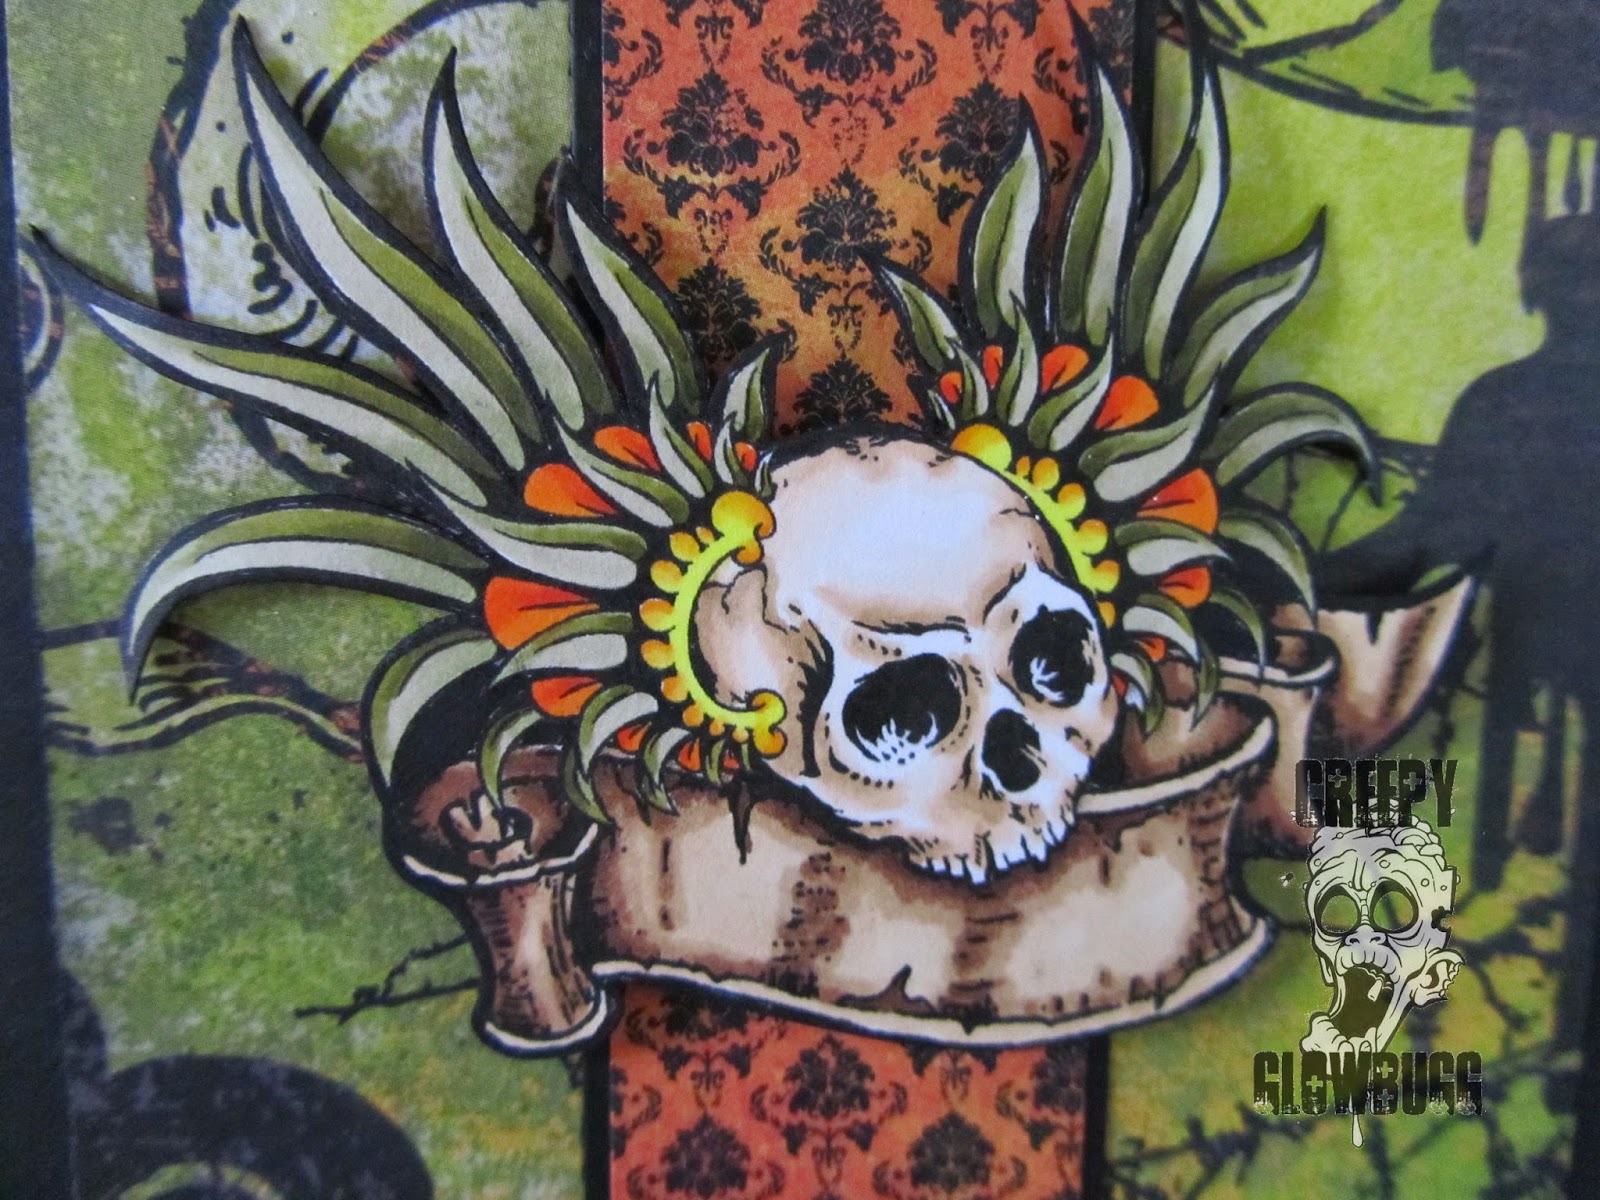
This guy is called, Fringe 1.
He strikes me as not only masculine, but Aztec in origin.
Must be those great feathers and headdress.
He'd even make a good Father's Day card for the edgier type Dad.

After coloring him in yellow greens and oranges/yellows, 
I fussy cut the image and popped it onto the front of some
Hallowe'en themed dp scraps. I even managed to destash some
orange acrylic dew drops, too. Score! 


I decided to go in a completely different color direction for this one.
This guy is called, Fringe 4.  

Since I have a stupid amount of Tim Holtz Idea-ology hardware and 
sctuff, I have been hanging onto the package backing on most of the products. 
The thought being that I can reuse it in any of my numerous paper crafting adventures. 
I finally incorporated a backing card into a project! One down, 25+ more to go!
I also added a couple of Sizzix die cuts with some heat embossed 
Frantage for a little bling.
Perfect for a Father's Day card, too!

 I'd like to enter these cards in the following challenges:

 Thanks for dropping by today.


Friday, April 11, 2014

Fun with ATCs

It's been a while, but I am participating in today's
challenge at Dilly Beans challenges
The theme is really simple.
Make an ATC.
This is the perfect time to use up some scraps,
and make a mini piece of art.

I used #376 Martin.
He is one of my favorite Dilly Beans images. 

I colored Martin with Copics, fussy cut him out, and then
attached him to a remnant background from some TH ink clean up.
I'm a die hard hoarder. Never throw anything away. 
The day I do throw it out, will be the day I want to use the damned thing.
I used the sentiment stamp for the very first time, even though I've had it for 
probably a year or more. Notice the addition of a cookie in 
Martin's hand. I drew it, and added it to match the sentiment. 
Not sure if Martin is the monster or not....   

I have taken a border sticker from Tim Coffey (K Designs?), and cut it apart to
make a stack of skulls for Martin to stand on. Lastly, I edged the ATC with
Orange Peel Stickles to add some sparkle.
Ta-dah!

Please stop by Dilly Beans challenge blog, and take in the eye candy the
DT has created for this two week challenge. 
Maybe even make an ATC of your own for the challenge!

I'd like to enter this in the current challenge at 

Sunday, March 30, 2014

Skullduggery in the dungeon

I've been neglecting my blog for far too long.
I am struggling with my creativity, but I can feel a shift in the atmosphere.
A change is brewing. I can feel it.

My creativity was sparked with the recent challenge at HDH,
Skullduggery.
The Minions are looking for skulls (hence the spelling), rather than the actual 
definition of the word, skulduggery.
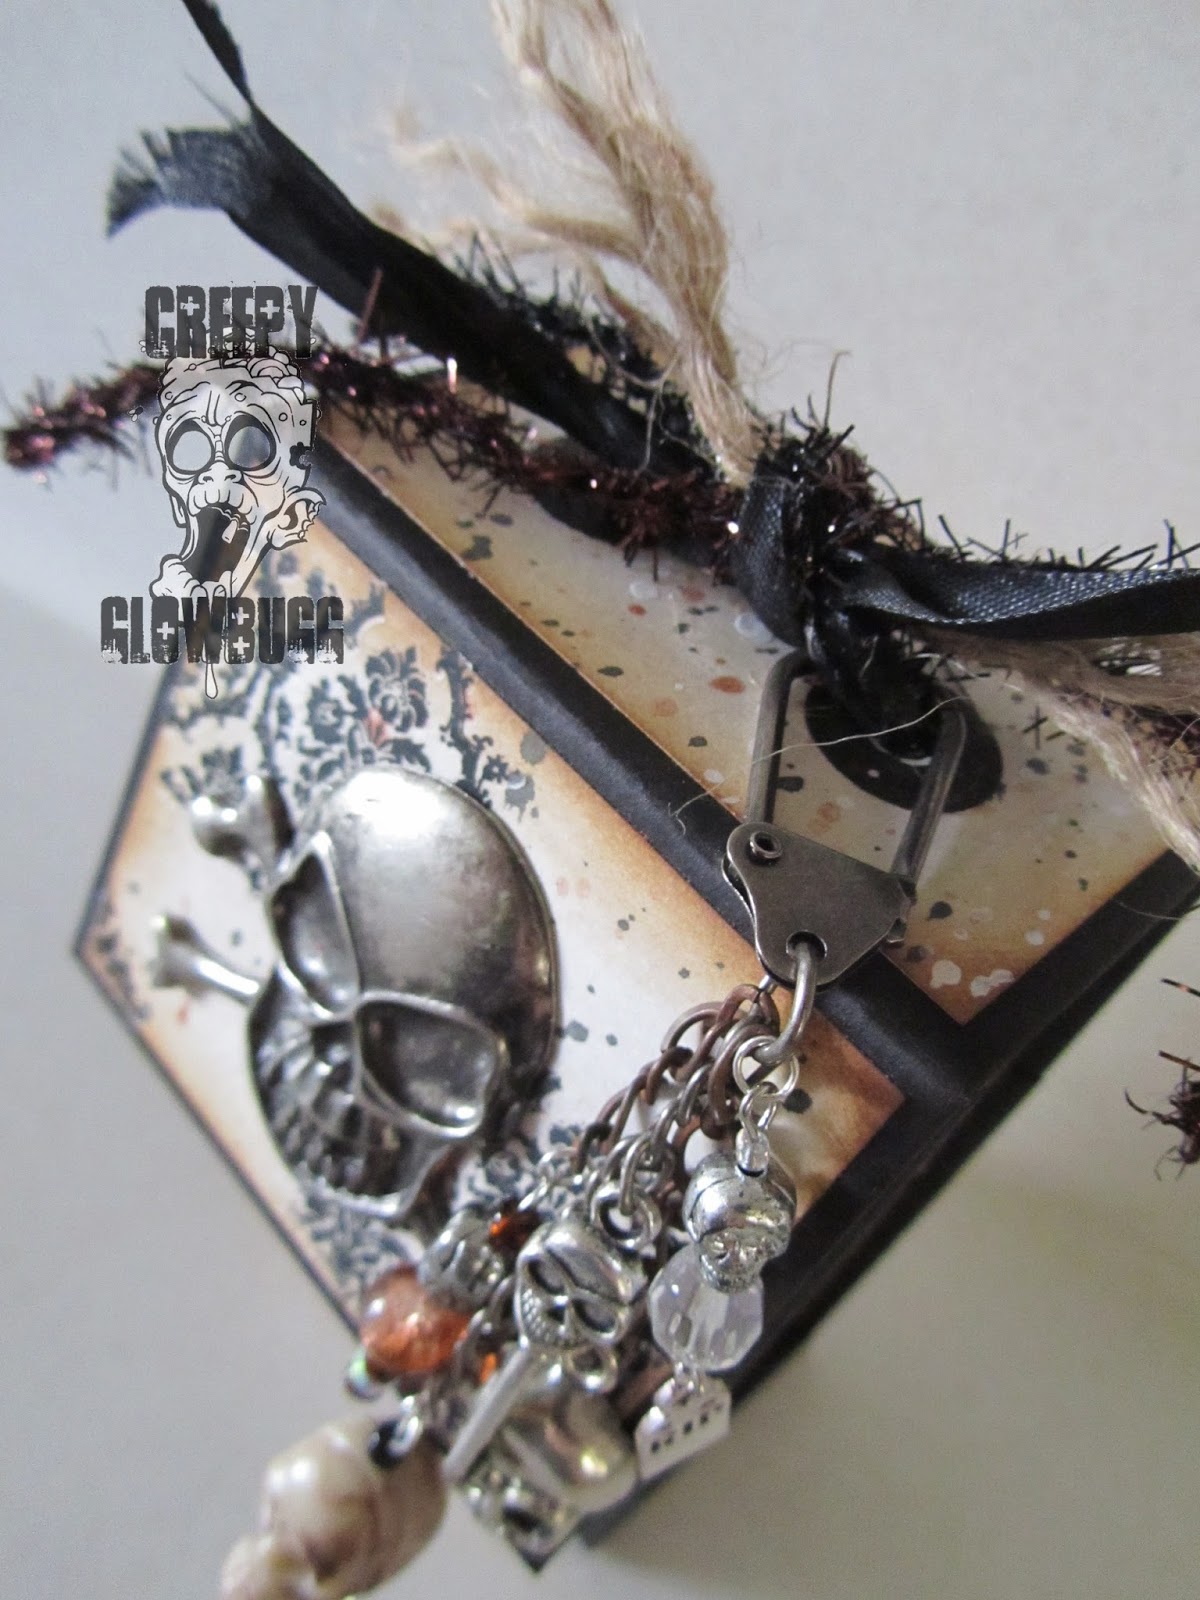
I decided to create my very first vertical, toilet paper tube, mini album.
I followed the tutorial found here

With skulls being the main theme, it gave me a good opportunity to
use up some of my hoarded skull stash. Like that big, metal skull, for instance.
One of the crossbones broke off of it, and I have been moving it around in my
stash for well over a year (or two). It feels good to finally use it.  

I created my own charms for the dangly bits.

Meaning, I strung them, and added the beads to the TH swivel thing. 
I think it adds a nice touch to the album, while still keeping it masculine.

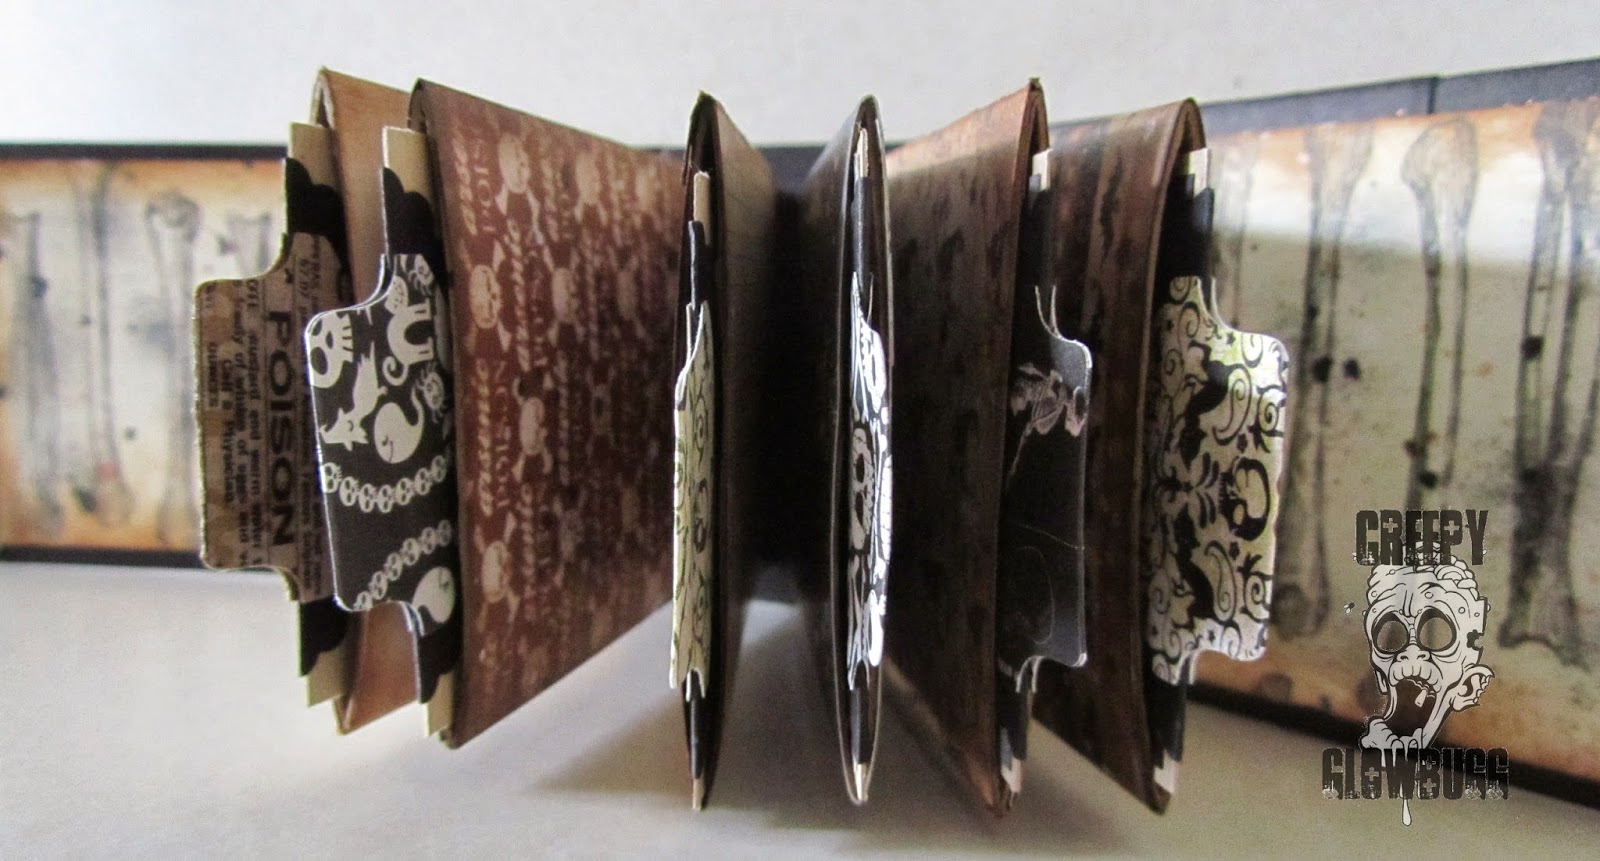
Side view of the innards.
There are six, flattened, toilet paper tubes in there, 
each with it's own removable tag.
The binding hinge is really the best part of this project.
I'm sure I'll be using it again in future projects.
The video is worth watching for the hinge alone.
Super simple, but so effective. 

Here is a nice shot of the technique I used for all of the dp panels,
and the internal tp tubes. I was trying to give everything a uniform feel, 
without being too, 'matchy matchy'. After edging the panels with vintage photo
Distress ink, I used black and white Dylusions Inks and Perfect Pearls in copper.
I just splattered the inks, as opposed to spraying them. I like the dingy,  
distressed look it gives everything. Plus, a little shimmer never hurt anyone.  

Here are the tubes with their tags. I was able to use up a bunch of scrap paper,
which is always a plus. I am currently trying to figure out how to better organize
my paper scraps, so I can use them up faster. I think I should sort them into
solids and prints, and the Hallowe'en papers should have their very own bin.
  
I used my SU small, oval scallop punch and folded it in half,
and glued it to the top of each tag. Then, I used the SU tab punch, to add the nice
 little tab at the top.  
  
Overall, this was a pretty straight forward project. The tutorial was easy
to follow, I was able to use up six tp tubes, and now I have 
this nifty little (3" x 5") tag book. 

I really enjoy making books from scratch. 
I may have missed my calling as a book binder. 

 I'd like to enter this mini album in the following challenges:
 (I went with a left side, diagonal, using metal, 3D, and sparkle) 

Thanks for stopping by!
  

Tuesday, June 4, 2013

Honor thy Skull

It's that time of year again, when we celebrate the cranium!!
Yup, it's Skull Appreciation Day!!!

I love skulls. All kinds of skulls. I have armadillo skulls, skull tattoos, 
skull art, skull toys, skull kitchenware, barware, clothing, purses, shoes, 
bandanas, skull stamps, skull paper crafts, embellies, etc... 
You name it, my husband and I probably have it.

That being said, I have a few Skull Appreciation projects 
to share with you today on the Smeared and Smudged blog hop.

First up, is an older project that is finally (nearly) finished.

This is my sgraffito skull. I started working on it last year,
and am determined to finish it and have it glazed 
and fired before Hallowe'en. 
Once it's fired, it will be a high gloss black with white artwork. 

I am trying to keep it in a fairly Hallowe'en theme.
Gah! I hate what I did to the teeth, but with everything else going on, 
maybe they won't be too distracting.

Another jawline spiderweb. And more bad teeth....

Thirteen has been my lucky number for years, so it was a given that
it be represented on my skull.

Back of the skull.
I still want to do something to the sides of the skull, but I 
haven't decided on a design yet.

My next project is a papercraft. Had to be done, no way around it.

I present you with,
She is a brilliant image drawn by Rick St. Dennis and available here.

She is fierce!

Colored with Copics, MS scarab border, and MS dp.
Done!


Lastly, is one of my favorite things to make out of polymer clay.

A wonky skull!

I created this background using some techniques I learned 
through an Andy Skinner workshop. Such a cool and fun texture.

Then, I artfully crafted this rather large skull out of polymer clay.
He's about 4 1/2" wide by 3 1/3" high. The backing plaque 
measures approximately 5" x 5". 
Overall, much larger than I usually make my skulls.

I used purple, black, and silver acrylic paints and washes to achieve
the color on the skull. I added a couple coats of satin sealer to finish it off.

Thanks so much for sticking around until the end.
There are a ton more blogs to visit on this killer, cranial themed, hop. 

Here is the list of Smeared and Smudged 
participants in order:

Terra
Tori
Laura
Kapree
Kristy
Sandy
Jacki
Rick St Dennis
Airless Chambers
Wendy
Julia
Susan
Lady Brayton
Black Dragon
Kay
Miko
Creepy Glowbugg
Aletha
Ike
Miranda
Hazel
Monique
Shoni
Suzi
Leigh S-B Designs
DominoART
Alison
Donna M
Donna W
Jane
De Stempelwinkel
Evil Edna
Jenn
Steph
Anna
Bombshell Stamps
Helen
Shell
Movie Magic Monthly Blog
Fiona
Serena
Little Black Kitten
Maureen
Karen
Milo
Teri

Wednesday, May 1, 2013

Strega in the DICC

Today I'd like to share my card for the new 
Rick St. Dennis is sponsoring the challenge,
and I get to be a guest DT as a fringe benefit.

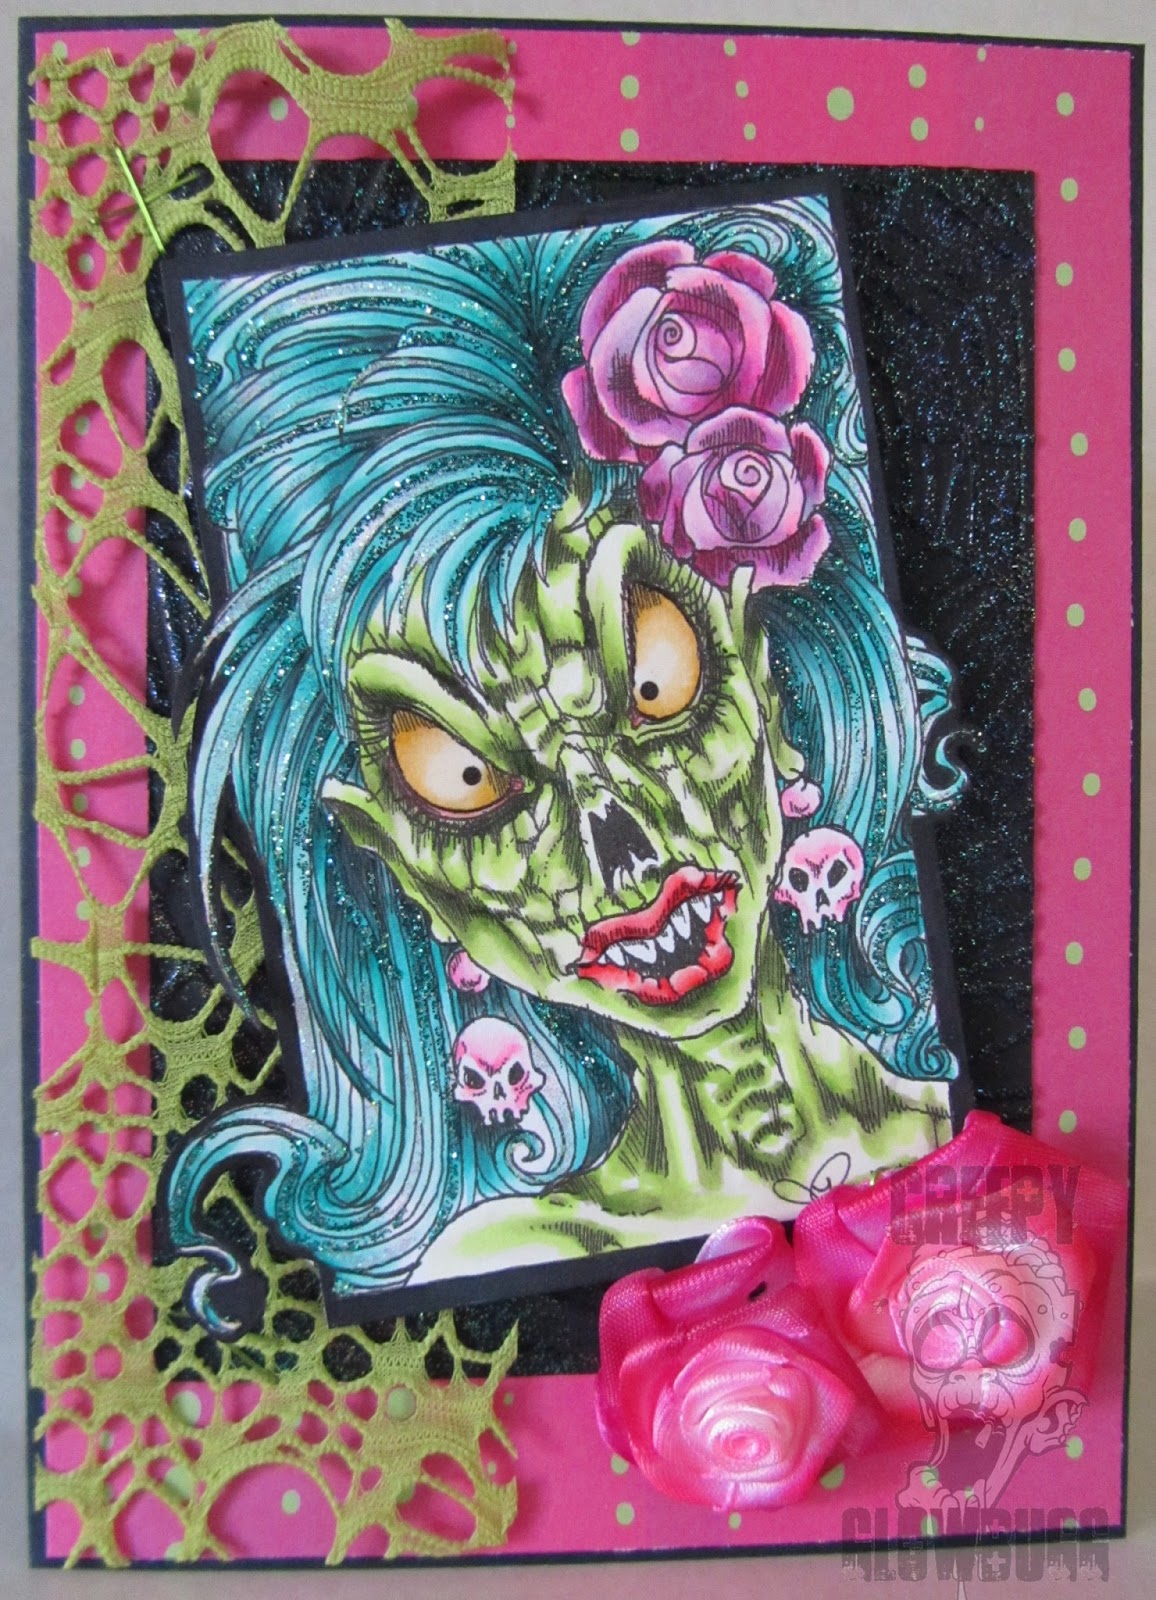
I jumped at the chance to color up, and create with 
one of Rick's newest "dark" images, Strega

Isn't she lovely? And oh, so deadly....
I liked the iris-less version 
(she comes with both versions when purchased here),
 since it played to my love of cartoons and comic style drawings.

I just went for it, as far as my color palette. 
She reminded me of an 80's style pop princess, 
hence the bright, bubble gum, color scheme. 

I used skulls-her earrings, hand colored satin roses, 
lots of Stickles glitter, and embossing, from the 
list of challenge choices. 

It was fun to create using set choices from the challenge.
I spend way too much time putting my creations together,
so it was nice to have only so many options to choose from.
I'll be playing along again, very soon.   

Please join us over at DICC, and play along to win some 
fabulous  Rick St. Dennis images. 


Thursday, August 9, 2012

Odd? Why yes, yes I am!

This week over at HDH we have an inspiration photo to
set your mojo a flowin'.

HDH145 inspiration photo
I actually chose the photo due to my (un)healthy obsession
with the Science Channel's, "Oddities" series.  
I have a mad crush on Ryan Matthew, the bone guy from the original
"Obscura" shop in NY.
Ryan makes articulated skeletal displays,
and my favorite, "exploding skull" displays. Ryan also lives in the most
amazing home, decorated with the most amazing specimens, taxidermy, bones,
etc... I told you, I loves him.
Now I have added, 'hippo skull' to my long list of
skeletal wants. 

Maybe he'd just let me clean and cook for him for free.
No strings, other than the fact that I can run around and touch all
his stuff, ... naked.
Sounds like a deal to me, but selling the hubby on it will be
rough since I kind of have the same deal going with him.

Anyhoo,
I went the very literal route and just reproduced the inspiration photo
as an ATC card. It seemed a little easier than actually mulling through all of my
schtuff to find just the right skull and bottles to work with.
It looked way cooler when it was just a pencil sketch, but
I need to remember that "practice makes perfect".
I colored it with Copics and Distress inks.

Since I have been bitten by the ATC bug, I needed a place to keep
all of the little cards until I decide what to do with them.  

I love iced tea. It is my favorite beverage, and I go through
a box of my favorite tea every other week.
I decided to put this little box to good use to hold my cards.

I had to make it cool, so after reinforcing the interior of the box, 
I painted it a flat black with acrylic paint.
I added some metallic ruby accent paint  to appear like aged wood grain.
I added a few Hallowe'en border stickers that I have too many of, and added a
cool skull button to act as a way to open the box.
I then painted Distress Stickles in Antique Linen all over the entire box to seal
everything and give it a nice speckled, shimmery finish.

And lastly,  

Juan got a new hat!
Thank you Hobby Lobby, for carrying Iguana hats!