Gah!
Another Halloween season is behind me, and I couldn't feel less
accomplished in pretty much every aspect of my life.
I guess that's why I feel so deeply honored to be asked to
I needed to get going creatively again.
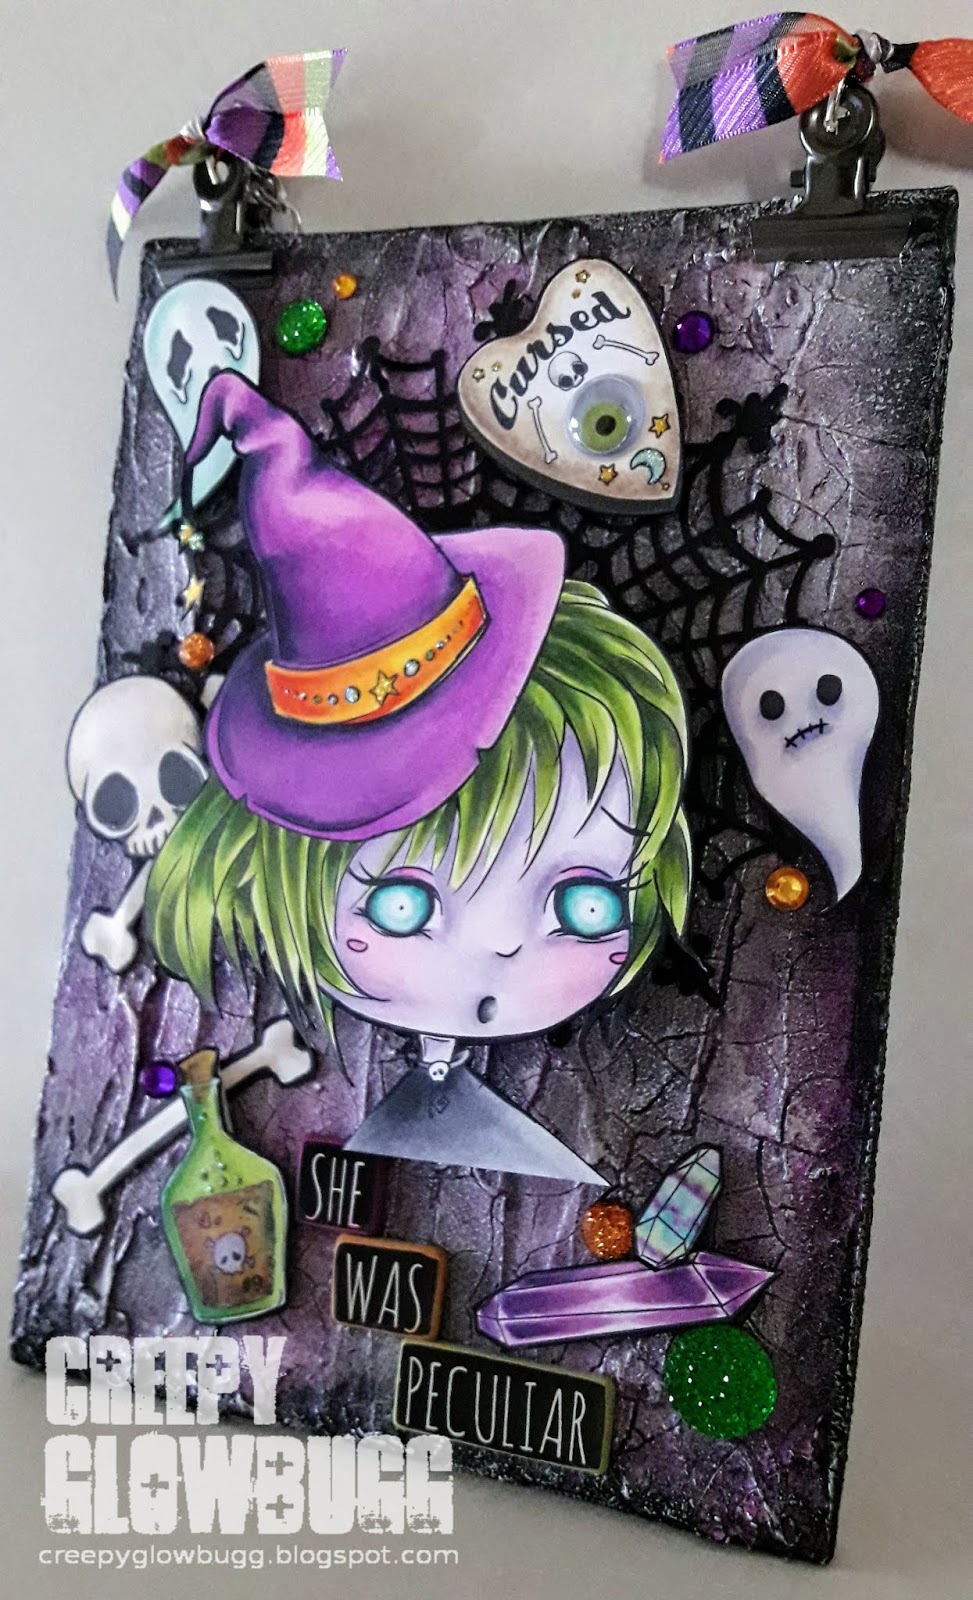
I mean, how can you NOT be inspired by this artwork?
Since really embracing my inner witchiness,
these kind of images really resonate with me.
This little witch beauty and her accessories
I already had a completed canvas board with a great texture
and crackle finish painted, and ready to go.
It paired perfectly with a spiderweb doily and the
images from this awesome stamp set. And then it was
obvious that I needed to cut up a TH quote chip.
I sanded the edges, and then inked them using oxide inks
which gave them just the finish I was looking for.
Lastly, I added some bling and sparkle, some TH clips,
a chain, and some of my favorite and coveted Halloween ribbon.
Oh?! Did I forget to mention that I mounted her head
on an action wobble thingy? Well, I did, and it's perfect!
Thanks for stopping by.
Stay tuned for more Halloween makes, as I'm not even remotely
ready to start the Yule season.