Showing posts with label mermaid. Show all posts

Friday, October 25, 2019

Brewing up some Trouble

Look who's back again!!
I was invited to be a guest designer for 
Creepy Cute Chronicles new image release today.

I have to admit that signing up for the
Creepy Cute Chronicles Exclusive membership was the best
$15 I have ever spent. Well worth the price of admission, folks!
If you haven't heard of it, you really must check out the details here.

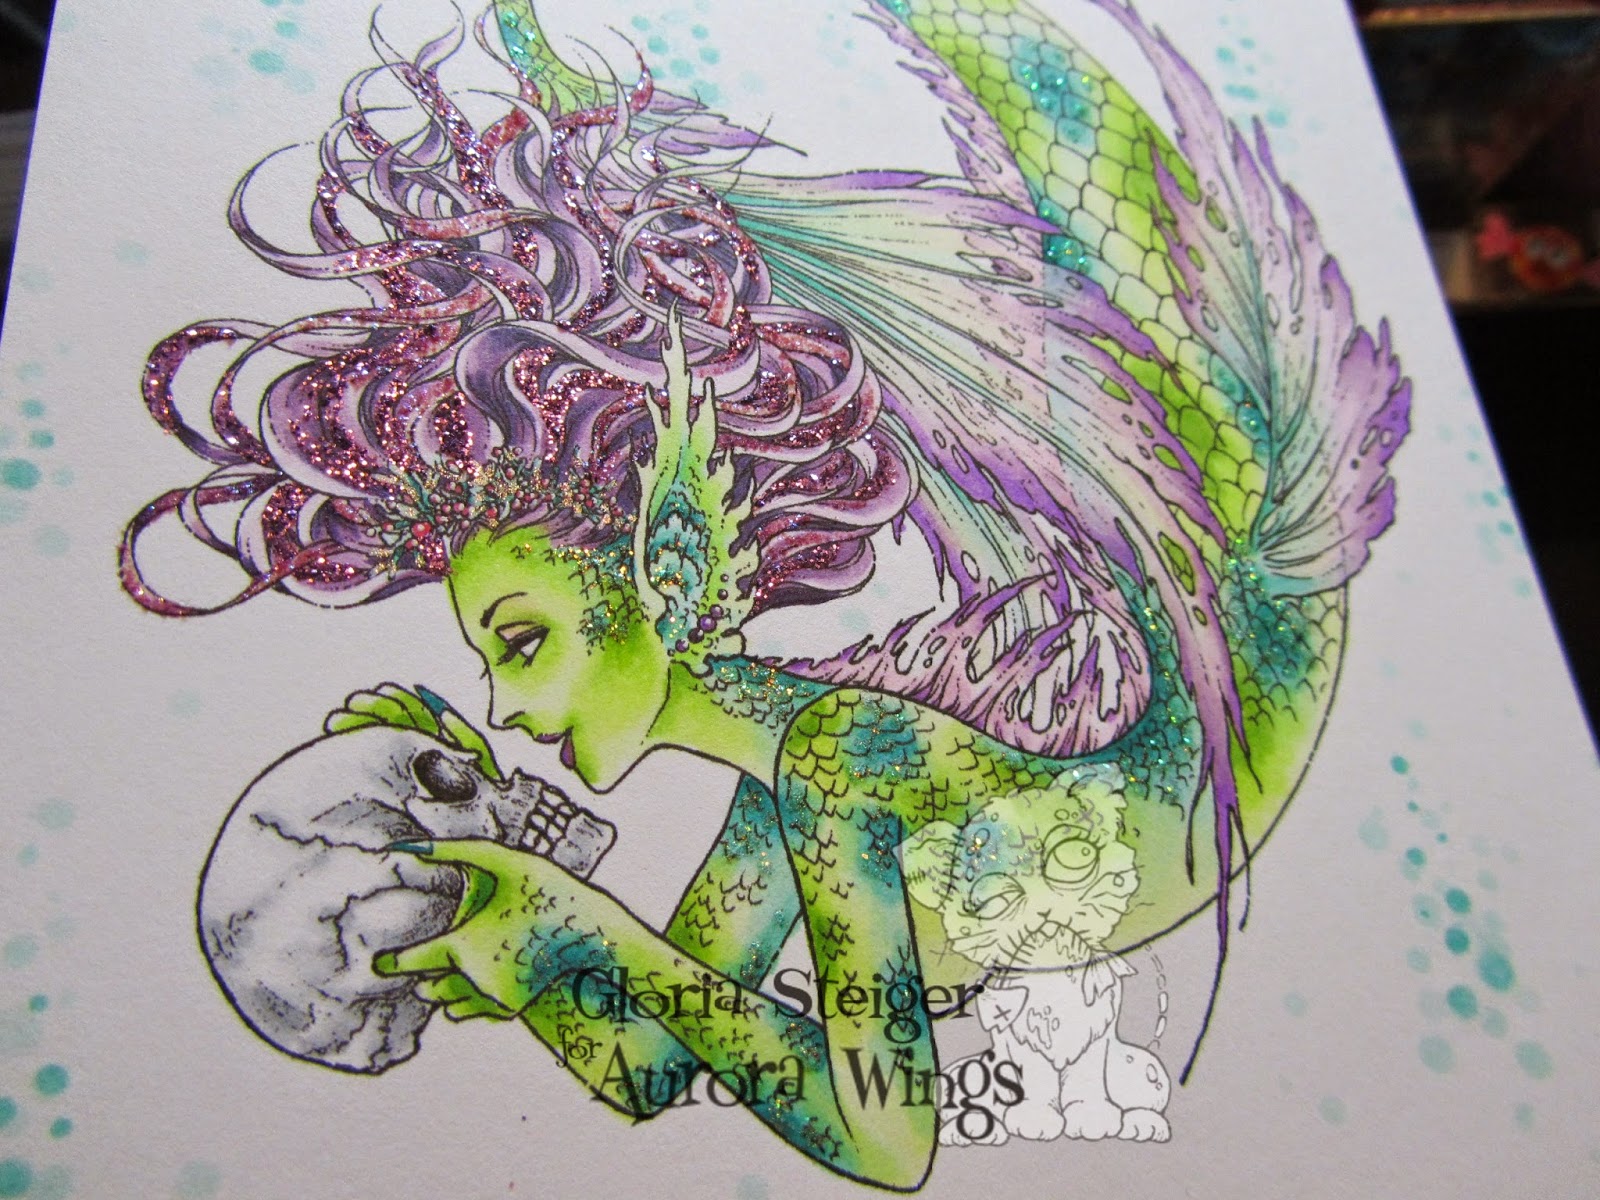
The weekly chronicles freebie this week is this fabulous Mer-Witch.
She is quite the stunner!!  

I had to color her up with Copics, as its my chosen medium to color with.
I tried to stay away from my standard orange, lime green, purple, and black
color scheme, but failed. I just don't see Halloween in any other colors.  

I also don't usually "do" scenes, but this little lady was just too
perfect to fussy cut out of her underwater lair. She comes in a set of
images which you can arrange any way you'd like, or use her already in
the scene as shown. She comes with lots of accessories and even a friend.   

I am still on my Nuvo drops kick. I used the green translucent drops
for her potion bubbles. And some White Blizzard glitter drops for some
underwater bubbles. I love these drops!

 Lastly, I mounted the colored panel onto some black card stock
and added a sentiment from my Halloween sentiment collection. 
I actually have an entire binder full of just Halloween words.
It's a sickness, but one I don't mind suffering from.

Thanks so much for stopping by today!
Have a great weekend!!! 
And don't forget to stop by the Oddball Art Stamps website and
get signed up for the CCC and even go for it and sign up for the 
Exclusive Membership as well. All the cool kids are doing it!! 

Wednesday, May 16, 2018

More Aurora Wings Springtime Beauties

Two days in a row?! Right? 
Don't get used to it, but I'll keep trying to create
and share here as often as time allows.

I have another Aurora Wings Mother's Day card to spotlight today.

I chose to use one of my favorite mermaid images,

I colored this beauty using Toner Grays and Blue Green Copic markers.
Pretty much my go to coloring medium. And BGs being some of my favorite
hues in the Copic collection.  

 I used some coordinating background paper and cheesecloth
for an ocean feel. Even tossed in some sequins for sparkle,
along with Stickles for more bling factor.
My MIL loved it.

I'd like to enter this card in the following challenges:


I'm not entering these cards in any challenges, but wanted to share them.

I chose this image for Grandma's card. 
This adorable family is called, Mushrooms.
Colored with Cool Grays and Violet Copic markers.

Kept this one in Grandma's favorite color, purple.
I really like how the foiled card plays nicely with the grays.
And as usual, this is Stickled for sparkle.

Meditating Mushroom is colored in Warm Grays and Yellow Red Copics.
I cropped the image for quicker coloring and better fit on the smaller
4.5 X 5.5 card. I added some Stickles to his 'bumps', 
and then covered them with clear Nuvo drops for an interesting texture.
 Used some lace and sequins to finish this one off.

Last, is little Poppy Sprite. Also cropped.
So sweet and fun to color using Cool Gray and Red Violet Copic markers.
Grosgrain ribbon, metal embellished ribbon, and black half pearls
compliment this foiled background paper and cute image perfectly.

Thanks for dropping by today.
I'll be back tomorrow with another project for your amusement.    
    

Tuesday, March 28, 2017

SDC:270 - Text Background

The current theme at
TEXT BACKGROUND.

This is one of those projects where you are immediately inspired by an image
and are thankful when it all pans out in the end.  

The new Merman stamp called, 'Snuhubala', by Daniel Torrente
is a perfect fit for his mermaid (one of three), 'Smumanha'.

I got lots of dimension by using various layers of doilies and die cuts.
And then used lots of foam dots on the happy couple for ultimate lift.

For my text background, I used an old dictionary page from a dictionary
I've had since high school. Quite vintage and nicely yellowed. I splattered some
Dylusions sprays to add some color, and added a love die cut for the sentiment.

I am quite happy with how this project worked out.
It's nice when something happens organically and as close to perfect as possible.

Thanks for dropping by my lonely little blog....

Be sure to check out all of the incredible art inspired by the text background theme

Monday, March 21, 2016

Still pluggin' away...

Yup, I'm still working on the wedding album I started last year
for my Aunt and Uncle.
Slow and steady wins the race, right? 
I should have this album finished by their third anniversary if
I keep at it. That's September of this year. 
I had better not put it away or I'll forget I'm working on it, again. 

It's a good thing the new challenge at the Aurora Wings Challenge blog is
Anything Goes.

In keeping with the Hawaiian/ocean theme I have used the adorable
I decided to crop the image to keep it small enough to fit into the layout,
and large enough to color it well with my aging eyeballs.
Reader glasses are my saving grace when it comes to coloring images
these days.

Using the same image, I separated the sea turtles and used them 
by themselves for added interest and to make the two pages cohesive.
I added lots of circle punches to give the feeling of bubbles, and some
branch die cuts to mimic coral. I have been collecting a TON of
charms and brads and schtuff for this project, and I finally managed to 
work in one of the fish charms as a cute dangle from the sentiment tag.
I'm trying to keep the dimensions to a minimum or the book will never 
close properly.

That's going to do it for me today. 
I hope you'll pop by the challenge blog and check out all of the 
incredible inspiration pieces my DT sisters have created for this
new Anything Goes challenge.  


Wednesday, August 27, 2014

Not your average mermaid

I needed a birthday card for a special person, and the only
requirement was that it had to have a mermaid on it.
I just so happen to have won a mermaid image from 
Lacy Sunshine, and was looking forward to coloring her up.

Her name is Morticia Siren.
She's pretty bad ass for a mermaid.

I colored her with Copics and backed her on to a glittered card stock.
I also lucked out and found some stashed pre-cut flourishes in the same shade
of pink as her hair. I like it when that happens.


And I had some old stashed dew drops in the same shade, too.

I kind of went wild with the Stickles in various shades of greens
and yellow.

I used a new Stickle color called, Tropical Tangerine in her hair.
I really like this color! I have yet to find a good pink colored Stickles,
but this tangerine color will definitely work. 

Thanks for dropping by today.

I'd like to enter this card in the following challenges:


Monday, August 18, 2014

Under the Sea

Wow, I can hardly believe we're already up to challenge #6 at
The new challenge theme is 'Under the Sea', and there is
no shortage of Aurora Wings images to choose from in this category.

I had a hard time choosing an image myself, but I finally decided on this
lovely siren of the sea. And the fact that there was a skull involved help
to sway my decision.

I started out coloring the 'Secret Kissesusing Copics.
I made blotches in blue greens to give her a spotted koi look. Or at least
that's what I had in mind while doing this.

My next logical and obvious choice was to add my favorite lime green hues.
I also started out by making blotches, and then just blended out to the blue greens.

Usually with this color combo, I go for orange as my next color to really
give good contrast and pop against the cooler tones. I decided to just stay in 
the cool tones and went with purple. You can never go wrong with purple. 
I added some air bubbles to the background so she didn't just look like
she was floating in midair. 

When I think of magical mermaids, I think glitter and sparkles. 
Always.

Lots of sparkle and glitter. Lots.

And here we have my all time favorite colors. 
All together, in one magical underwater package.
This card is going to my SIL for her birthday, today.
She's not a super girly-girl, so I think she'll dig this card. 

Thanks for dropping by today.
 I do hope you'll make a trip over to the Aurora Wings challenge blog
and see all of the wonderful under the sea inspired DT projects.
Truly inspired works by all of the DT, you won't want to miss it.  


Monday, March 17, 2014

Aurora Wings challenge blog launch

Welcome newcomers, and old friends!
Today marks the launch of the new, Aurora Wings challenge blog!
Hopefully, you are already familiar with Mitzi's stunning artwork, but
just in case you've been living under a rock, 
here are some links to see just what you've been missing. 


I am still a bit stunned at being asked to join such a  diversely talented
design team. I mean, we have some of the most talented ladies in crafting
on this team. As you peruse the blog, you'll see what I mean.

The first challenge for Aurora Wings is 
Anything Goes!
This theme is a crowd favorite, and you can use any image from any company you wish.
Please be sure to read our rules in the tab marked, "rules" up above, 
to make sure you're eligible for the awesome prizes up for grabs for each challenge. 
Let me just say, Mitzi is one of the most generous artists, 
and offers up the best prizes in blogland. Just sayin'.

So, do ya wanna see what I made for today's special event?

Whoa, right?! Who am I, and what have I done with 
"Creepy Glowbugg"?!
I know this isn't my regular "creepy norm", but it felt good to let
my mainstream creativity flow.

I began my project by coloring this gorgeous image called,
I color everything with Copics, and this little lady was no exception.
I mounted her onto an altered Spellbinders Fleur de Lis Square die cut.
I then heat embossed pink and blue Frantage onto the die cut to make it
all fancy.

I used a thrift store frame that I purchased for a dollar,
and gessoed it, and then painted it with various metallic paints.
Lastly, I used some Tim Holtz crackle paint in Picket Fence.
I think the crackle gives the entire frame a "by the sea" feel.

While at the thrift store, I happened upon a huge bag of seashells.
For $5!!! This was a find that no good crafter could walk away from,
so I snatched up the shells before anyone else could "steal me pot o' gold"!  

Having such a large quantity of shells, gave my husband free reign to  
experiment. He cut a couple of the shells in half for me to use on this project.
I almost think I prefer the shells cut in half. They look so much more interesting this way.
I am pretty proud of how the skeleton leaf turned out, after having a complete 
makeover using gesso and periwinkle metallic paint.
You'd never guess it was once bright orange, would you?

Here's a nice shot to show all of the different textures and mediums
I used for this project. I broke out with some burlap and then painted some 
gesso on it to soften it a bit. I used up some old stash with the pearls and jewels,
and even used quite a bit of sea glass, which I seem to have an abundance of, as well. 

Thank you for stopping by today. 
I hope you are inspired to play along with us at