Showing posts with label Haunted Design House. Show all posts

Sunday, May 22, 2016

The Evil Has Returned!!

Like a bad penny or a demonic doll, the Minions have returned
 to unnerve and amaze you with our dark spin on arts and crafts.

With nothing but tricks and bugs up my sleeve, I have managed
to create a project that has been haunting my brain space for years.
Yes, YEARS! I have been collecting, hoarding, and pilfering
bits and bobs for this particular project forever.
Ready?

I have finally created a Haunted Design House of my very own!!
Pretty fuckin' cool, right?!!

The little house started out pretty unassuming. 
I picked it up at my local thrift store, and painted it with gesso to give me a nice,
clean base to begin my wicked handy work.  

After a bit of deliberation, I opted to go with an overall crackle effect 
using DecoArt Weathered Wood crackle medium. I have hit and miss success 
with this product. You have to be very quick when applying the top paint coat,
and be sure to NOT go over the same place twice, or the crackle will not happen. 
In the end, I am pretty happy with the crackle, but was hoping for all of it to be 
perfection. Must be the Virgo in me...
The roof was created by using Golden resin sand to give an awesome texture like all
haunted houses should have. In retrospect I should have mixed black acrylic paint 
into the medium to save myself the step of painting the roof black afterward. 
Now I know for next time.  

After the roof was dry, I applied Inka Gold metallic rub in green/yellow.
I thought this would give the appearance of a rotten moss covered roof.
I added some fun plastic skeleton hands on the roof for a creepy carnival feel.
I used a heat gun to soften the plastic and shape them to look as though
they were grabbing the rooftop. I adhered them with trusty E6000. 


And now for the fun part. The embellishments! 
I had a shit ton of Halloween papers and google prints to choose from in my stash. 
Each room was carefully planned and decorated accordingly.
I used matte medium to apply all of the paper pieces.

Everyone knows that bats always inhabit the attic of every haunted house, right?
My is attic is actually a bat museum though, as the sign clearly states. 
I added a woodcut bat, some paper punched bats with clip art heads, 
and some plastic Halloween tree clippings.
I sprinkled mica flakes and glitter from Finnabair on the floor, and then decided that they
kind of looked like fall leaves, so I added some flakes to the branches as well.

The anatomy room is on the next floor. Complete with a hand painted skull,
a mummified pig fetus specimen, a vampire jaw charm, and a random bottle of gold elixir. 
Various diagrams and a brain on the floor are a necessity in all anatomy rooms.    

This room is the "Spook Show" room with spook show posters, a shiny jack-o-lantern, 
and of course some ghosties. I sprinkled some MS glitter on the floor for some sparkle.

No haunted house visit is complete without a proper palm reading.
I cut off a Barbie hand and glued it under a TH dome. I love that detail.
I used some Tarot cards and a palm reading chart to decorate the floor
and walls. And there are a smattering of spider die cuts scuttling around as well.   

The next floor houses the apothecary rooms.
This one has some fun two-headed taxidermy cut outs and more jars of schtuff. 
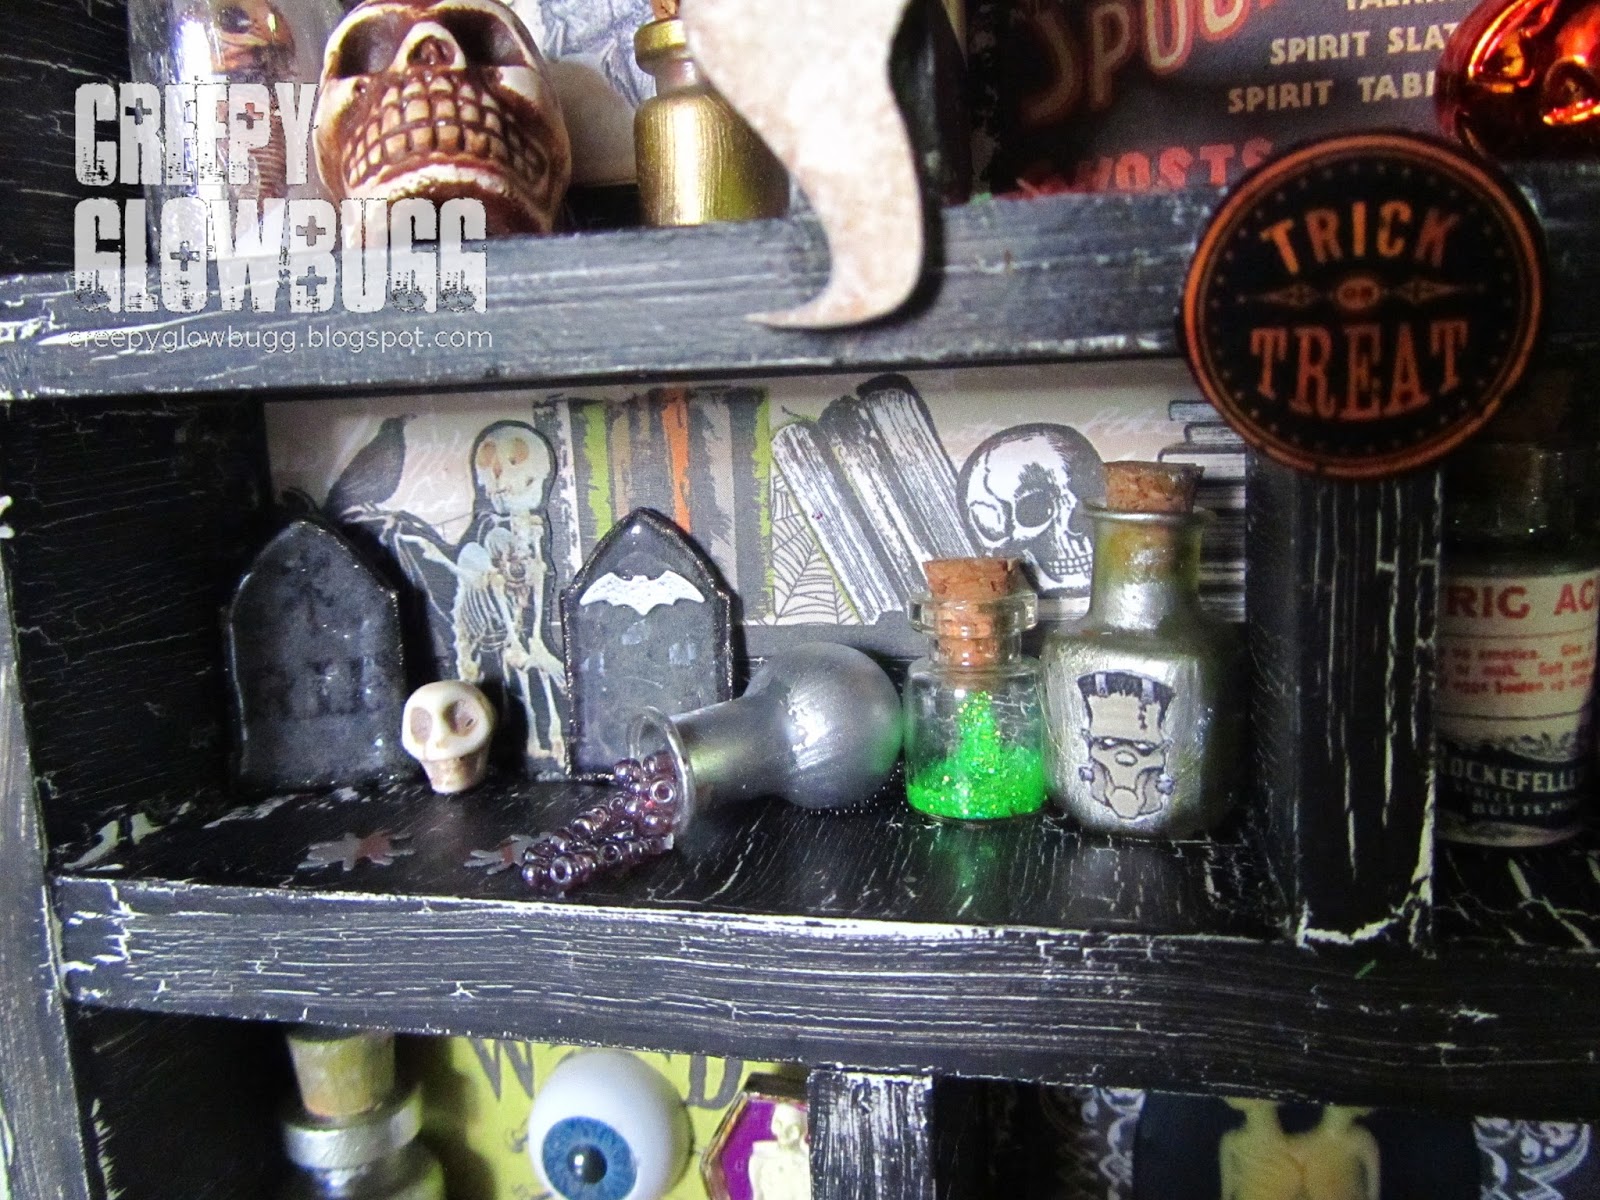
This one has some MS punched tombstones, a teeny skull, and some 
jars of monster makin's. I love how the spilled jar of microbeads looks.
I used matte gel medium to suspend the spilled beads.  

The bottom floor houses the headstones and coffins.
More gel medium and seed beads for interest.
The coffin and headstone are from Michaels miniatures that they sell 
at Halloween to go with their Halloween Town collection.  

A jar with a human eye, and a fun eyeball and crossbones adorn the 
back wall. The teeny coffin and skellie wouldn't fit in the coffin room, so it
found it's way in here. More MS glitter and spiders on the floor.  

And finally, the twins' room! 
I used a cool Siamese Twins cabochon and some left over paper cuts here.

Well, I have to say that it feels so good to finally get this creation out of my head. 
It's been taking up so much space in there!
Thanks for letting me take you on a tour. It was fun for me. How about you?

I hope you'll pop by the Haunted Design House 
to see more of what's been haunting the Minion's thoughts lately as well. 
We missed having visitors despite what the trespassing signs may indicate... 

I'd love to share this with the Dark Attic Challenges - Anything Goes


Monday, September 7, 2015

The Nights are Drawing In at HDH

Is it Monday, already?! Man, where did the summer go?
The days are starting to get shorter, and the nights are drawing in
I am so ready for Autumn! And what is the best part of Autumn?
Well, Halloween of course!

Here is my inspiration creation for the new challenge at 

I put together a mini curio cabinet from Retro Cafe Art, and painted it 
a gorgeous shade of neon purple. I  love that color! I wish I had hair that color.

Since I am so bad at taking step by step photos, this is the
next step photo I have. Ta-dah! 

After painting the cabinet purple, I applied a crackle medium,
 and then black paint as the final step. Actually, rubbing silver
Inka Gold on it was the final step.
The neon purple paint is very sheer, so after applying multiple
coats and not being happy with the coverage, I just glued a bunch
of Rock Candy loose glitter all over the back panel in each shelf.
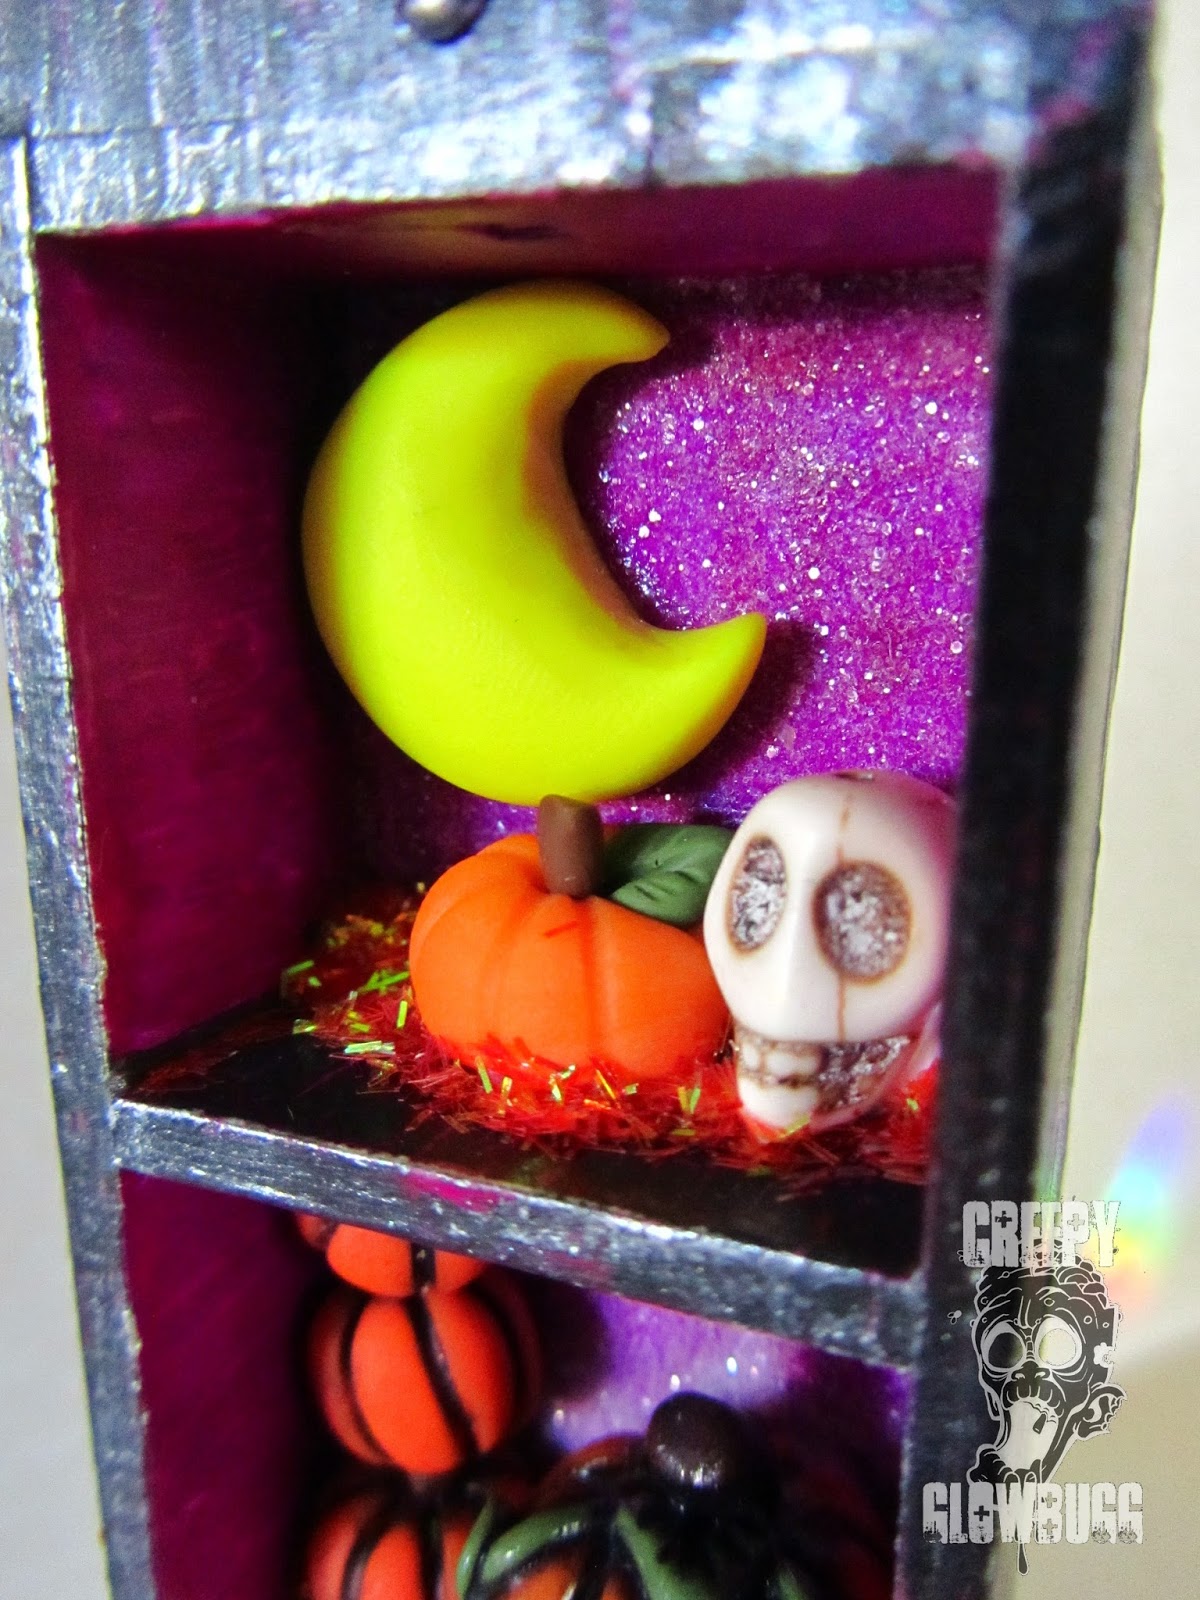
Then the fun really started! I began adding the little (mostly) handmade 
bits and bobs like the polymer clay crescent moon and the pumpkin. 
The skull is a ceramic bead. I added some fun MS glitter to the bottom
for some added interest, and to hide any unsightly glue residue. 

Here's some more of  my poly clay handy work.
I stacked the three tiny pumpkins behind the wonky eyed
fellow, and added more glitter. Reminds me of hay, a bit.

And what is Halloween without a headstone or a ghost?!
The ghostie is my creation, while the headstone is from Mike's
Halloween Town accessories. The ghost glows in the dark.

.
I painted a metal embellishment black, and then once it was dry
I added some Inka Gold in purple. I glued it to the cabinet, and then
adhered a handmade polymer clay skull and some opalescent gems to it.

Here's a nice shot of the crackle effect.
I really like the contrast of the purple and the black.

So this is it for me today.
I'll probably pop this in my etsy shop in the next day or so.

Thanks for stopping by, and be sure to check out the other eye candy

Thursday, August 20, 2015

Fuzzy stuff with teeth

I am super late for the current challenge at Haunted Design House.
We're looking for fur, feathers, teeth, and claws
Pretty simple prompt.

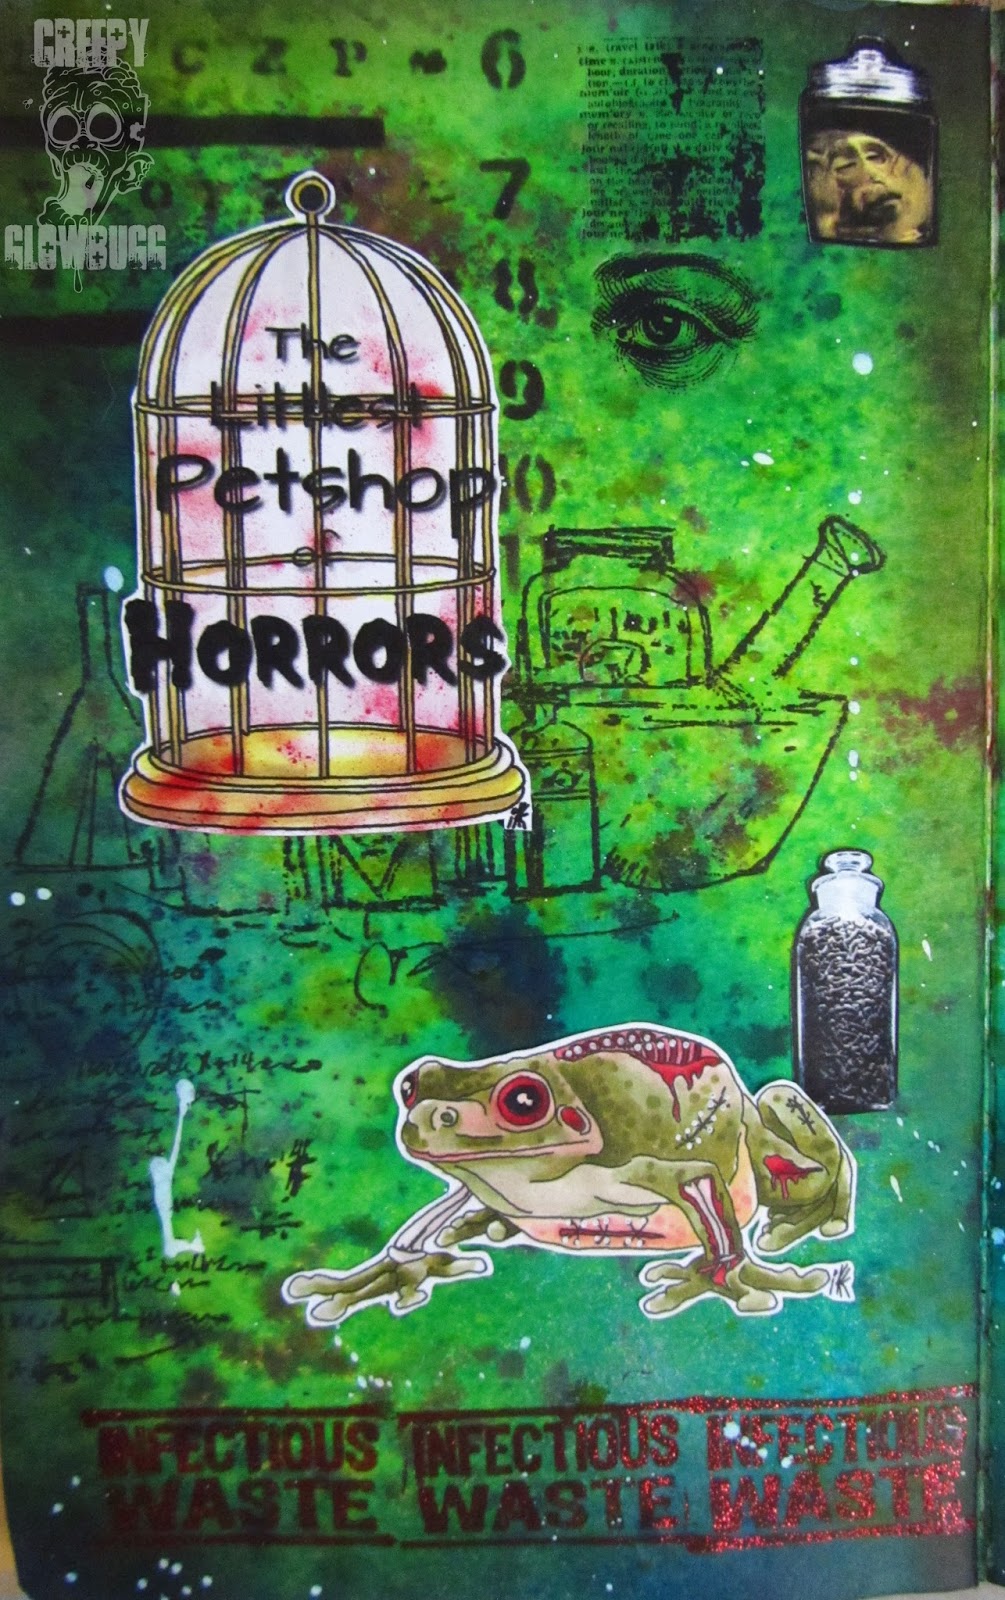
I decided to work in my small Dylusions journal. 
I still haven't worked up the courage to do anything with the larger
journal. This one is much less intimidating.
I began by using Dylusions inks on the background. 
Followed by some TH stencils, rub-ons, and stamps.  
This made the perfect laboratory feeling background for these

I used the cage image and added a title onto it in Gimp.
I thought I was being clever here. 

Isn't this frog just perfection?
I used some red foil embossing powder to give some sparkle to the
infectious waste stamps. The Dylusions sucks up the Versamark, so you have to 
work fast to get the embossing powder to stick. Still got a nice effect without the
actual dimension of the embossed powder.

I have some strange stamps that I rarely get to use.
Sometimes they're so strange they're hard to work into a project.
This stamp is perfect for this page.
That is a money paw in a jar, in case you were wondering.   

This little guy has probably had too much lithium already.
And probably some toxic radiation, too.

The original Pet Shop images comes with a zombie dude,
but I dropped my black pen right on his face and couldn't save him.
I did however have this awesome Vincent Price stamp that covered
quite nicely. I colored him to look as though the toxic glow was
emanating from the toxic guinea pig.   

Can't have a laboratory without a monkey head wet specimen.
I am not a fan of wet specimens. At all. But I do like me some 
taxidermy and skeletal remains. Just not wet ones.


Tuesday, July 7, 2015

My creative soundtrack

I don't know about you, but I simply MUST have music playing while I'm creating.
Although, I did have TerrorVision playing on You Tube last night while I finished 
up my latest Haunted Design House - Macabre Monday challenge piece.
The new challenge is "I Love Rock & Roll"
and you are to choose a song as your inspiration. It can be the music,
the lyrics, or even the video imagery to whet your creative appetite.

I originally chose "Rat Trap 666" by Die Antwoord, but after listening closer to the
lyrics (they're from South Africa so it gets hard to decipher at times), I chose to
go in another direction. Have you ever ran across an old CD and have no idea
who it is? I found an Otep CD that I totally blanked on, but the very second I put it
on I instantly remembered this chick. I am usually not a big fan of women fronted
metal bands,  but this chick is bad ass. I really dig her and her gritty sound.
The lyrics to "Blood Pig" really spoke to me, and allowed me the freedom
to create something that represents me. The lyrics are a bit "colorful" so
I'll warn you now, and show you the lyrics I used for my altered mouse trap.
Yeah, an altered mouse trap was what I wanted to make, hence the idea to use
the first song, if only for the title.  

Blood Pig on the album Sevas Tra by Otep 

I'm fucked up
I'm different
Words remain
My only escape

Art saves
All of me
Evolving


Yeah, that pretty much sums me up.

I have recently started collecting ideas for this project on a Pinterest board
I created here: Glo's pinterest board . I really like how small these are,
like an ATC, but a little larger at 1 3/4" x 3 3/4". They make great note holders
and just neat little bits of altered art. 
I began by purchasing a set of four traps for under $2, and I'll be checking out the
Dollar Store next time I'm out and about. After removing some of the unnecessary
hardware,  I gessoed two of them, one in black and the
other in white. I was still very undecided at this point.

I decided to use some Silks acrylic glaze, and I love how it turned out!
 I used Spiced Pumpkin and it gave such a beautiful, fiery color to the
black gesso. Like the flames of hell fire coming to get me...

After the paint dried (it actually takes 48 hours to cure completely, so this was a bit tacky),
I used matte medium to apply some images I had saved on my computer. I felt that these
images represented me in some way. Either in aesthetic, or attitude.

My sinister sistah, Donna hooked me up with some super kewl
charms when we finally made contact, so I used this guy as my
main focus. I used black acrylic paint to the recessed areas to
bring out the details more, and even went so far as to use Inka Gold
in green, purple, and orange to add some color to the crown.
I also went nuts with the Glossy Accents and Glossy Crackle products. 
Crackle on the Ouija board, and Glossy on the spider punch cuts.  

I love me a good Cthulhu image, some (paper) spiders, 
a 'Going to Hell' charm, and a sentiment that pretty much sums it all up. 
I usually go with a matte medium to seal everything, but once I saw how the
Glossy Accents really showed off the color of the Silks, I opted for a glossy medium.  

I was just turned onto shopmissa, where everything is $1, and I saw
these spikes that are used on nails as nail art (can't imagine wiping my butt
with hands festooned with spikes, but that is pretty heavy metal). 
I knew I could use them in multiple ways in my art. 
I bought a bunch. They were 20 for $1, c'mon! 

I used Glossy Accents to glue them down, and then thought they needed to be
embedded in GA to stay on forever. Perfect!


I added some Tim Holtz Halloween rub-ons for some
interest on the sides.

So now you know a little bit more about me, and hopefully you'll be
back anyway.

I'd like to enter this in the following challenges:


Monday, June 1, 2015

Bug. Bugg. Buggs.

The new challenge over at Haunted Design House is a 
theme that is near and dear to my heart,
I'm mainly partial to the bugs and the gems. Still not
quite sure what a "gewgaw" is, but I think it's a
non-essential embellishment. I've got those in spades, too.

I have quite a few framed insect/bug specimens in my collection,
so I figured it would be cool to make my very own specimens.

I got the idea from an episode of America's Next Top Model, where the 
models had to pose with hissing cockroaches that were on leashes 
and covered in jewels.

I used a rubber cockroach I picked up on clearance at Wally World
after Halloween. It comes with a small glow stick you can insert into the  
abdomen for a cool effect. Maybe I'll try and get pics of  that later.
I had a hell of a time getting the jewels to stick to the stretchy rubber 
the bug is made of, but Glossy Accents came through in the end.
I painted the frame with black paint, dry brushed red glitter paint on the edges
and sides, and then added a couple of stamped flourishes embossed 
with red foil embossing powder.  Lastly, I sealed it with a coat or two of
gloss medium.
   
This spider was hard plastic, with a hollow body on the back making
it difficult to glue into place. So, this guy is something of a wanderer. 

He goes very nicely with my spider web under glass, don't you think?

And he looks right at home among the other oddities and creepies
on my mantle.

Thanks for dropping by today.
Be sure to check out the other bugs, rhinestones, and fancy bits 
over at HDH!!