Showing posts with label masculine. Show all posts

Saturday, November 3, 2018

Hellgnome!!!

Woo hoo! I'm back today to share a card I made using a digital

My friend, Stephanie thought I'd dig these images for some strange reason.
And she was so right! These aren't your run of the mill all occasion images.
Unless you're like me and like to create weird stuff all of the time.

This image is called, Skull Monster.
If it's not in the shop, it will be very soon. 

I colored this bad boy up with Copics and matted it onto silver card stock.
I added a few more white dots, and tried my hand at using blending fluid
to add spots in the gray areas. That's kind of scary to do after you've colored
an entire image. Probably won't do that too often.
Finally, I added the word, 'SEEK' and this dog is ready to hunt. 

Check out the Hellgnome Death Digi shop, and both the facebook 
and Instagram pages for inspiration and group shenanigans.

Monday, June 11, 2018

Sunday, May 6, 2018

Let me introduce you to the Gent

Man, where does the time go? Seems only yesterday I was trying
to get back into creating and blogging more often. Then, radio silence.
Well, I'm back! 
This time I should be around a bit more often since I am on the newly
supporting and creating art using the current line of stamps created by 

I chose to start by creating an insert page for my art journal.
I picked up a pack of these from Tuesday Morning on the cheap. 
They came in three different colors; manila tag, black, and kraft. 
I had the bright idea to use a black page, and then I heat embossed The Gent 
image with black powder. Now, how the heck was I gonna color this thing?!

I decided to give it a go using some Stampin' Up watercolor pencils.
Since my selection was limited, I was challenged to come up with a flesh tone.

I ended up using browns, oranges, yellows, and white. 
Not sure it worked all that well, but it does convey a flesh-ish tone.   
It toned down quite a bit once I used some water to blend it out.

I created the background using Distress Oxide inks.
I love these inks. They blend like buttah, and I love the
oxide effect that is achieved simply with water.  

 I have a bunch of mustache brads that I rarely use, so I was
determined to get one on this project. I used it to cross the "t". 
Pretty cute, if I do say so myself.

I added some washi tape and hardware to the upper corner.
I tried to keep it pretty flat along the left hand side as it will be added 
to my art journal, which already has issues closing.

 I added some silver gear die cuts, and broke out my Distress crayons
to add distress and grunge all over the place. I love the black crayon. It's perfect
for adding dimension and shading on projects like this.
Lastly, I added black and white splatter to give an over all cohesiveness to the page.

That's it for me today.
Be sure to pop by the SpeshInk blog to meet all of the new DT talent, and
prepare for the next installment of art made with these awesome stamps.

Friday, June 6, 2014

Smeared Fringe

Greetings!
I am here to share my weekly make for Smeared Ink.
I always need blank note cards, or a blank all occasion card,
but always seem to have used my last one already.
So, I decided that now would be a good time to add to my
stash of blank cards.

I have used two of the images from the versatile set of digis named,

This guy is called, Fringe 1.
He strikes me as not only masculine, but Aztec in origin.
Must be those great feathers and headdress.
He'd even make a good Father's Day card for the edgier type Dad.

After coloring him in yellow greens and oranges/yellows, 
I fussy cut the image and popped it onto the front of some
Hallowe'en themed dp scraps. I even managed to destash some
orange acrylic dew drops, too. Score! 


I decided to go in a completely different color direction for this one.
This guy is called, Fringe 4.  

Since I have a stupid amount of Tim Holtz Idea-ology hardware and 
sctuff, I have been hanging onto the package backing on most of the products. 
The thought being that I can reuse it in any of my numerous paper crafting adventures. 
I finally incorporated a backing card into a project! One down, 25+ more to go!
I also added a couple of Sizzix die cuts with some heat embossed 
Frantage for a little bling.
Perfect for a Father's Day card, too!

 I'd like to enter these cards in the following challenges:

 Thanks for dropping by today.


Sunday, March 30, 2014

Skullduggery in the dungeon

I've been neglecting my blog for far too long.
I am struggling with my creativity, but I can feel a shift in the atmosphere.
A change is brewing. I can feel it.

My creativity was sparked with the recent challenge at HDH,
Skullduggery.
The Minions are looking for skulls (hence the spelling), rather than the actual 
definition of the word, skulduggery.
I decided to create my very first vertical, toilet paper tube, mini album.
I followed the tutorial found here

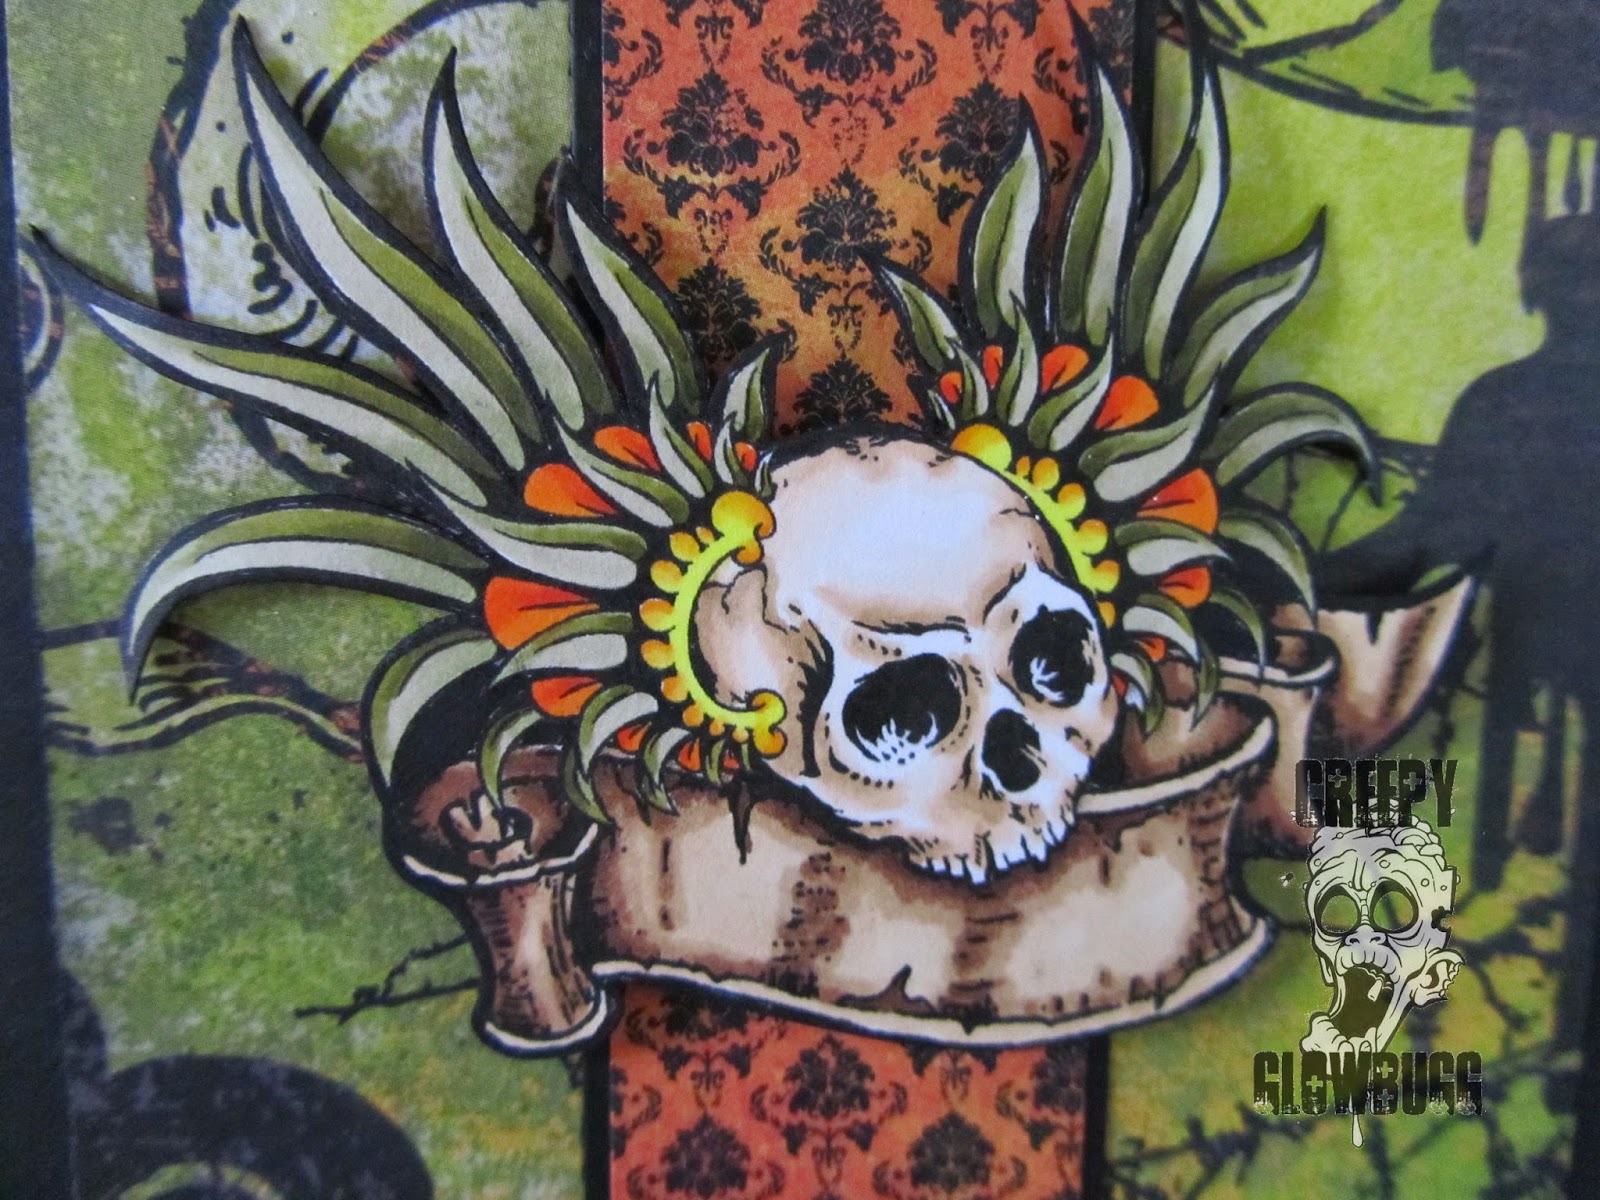
With skulls being the main theme, it gave me a good opportunity to
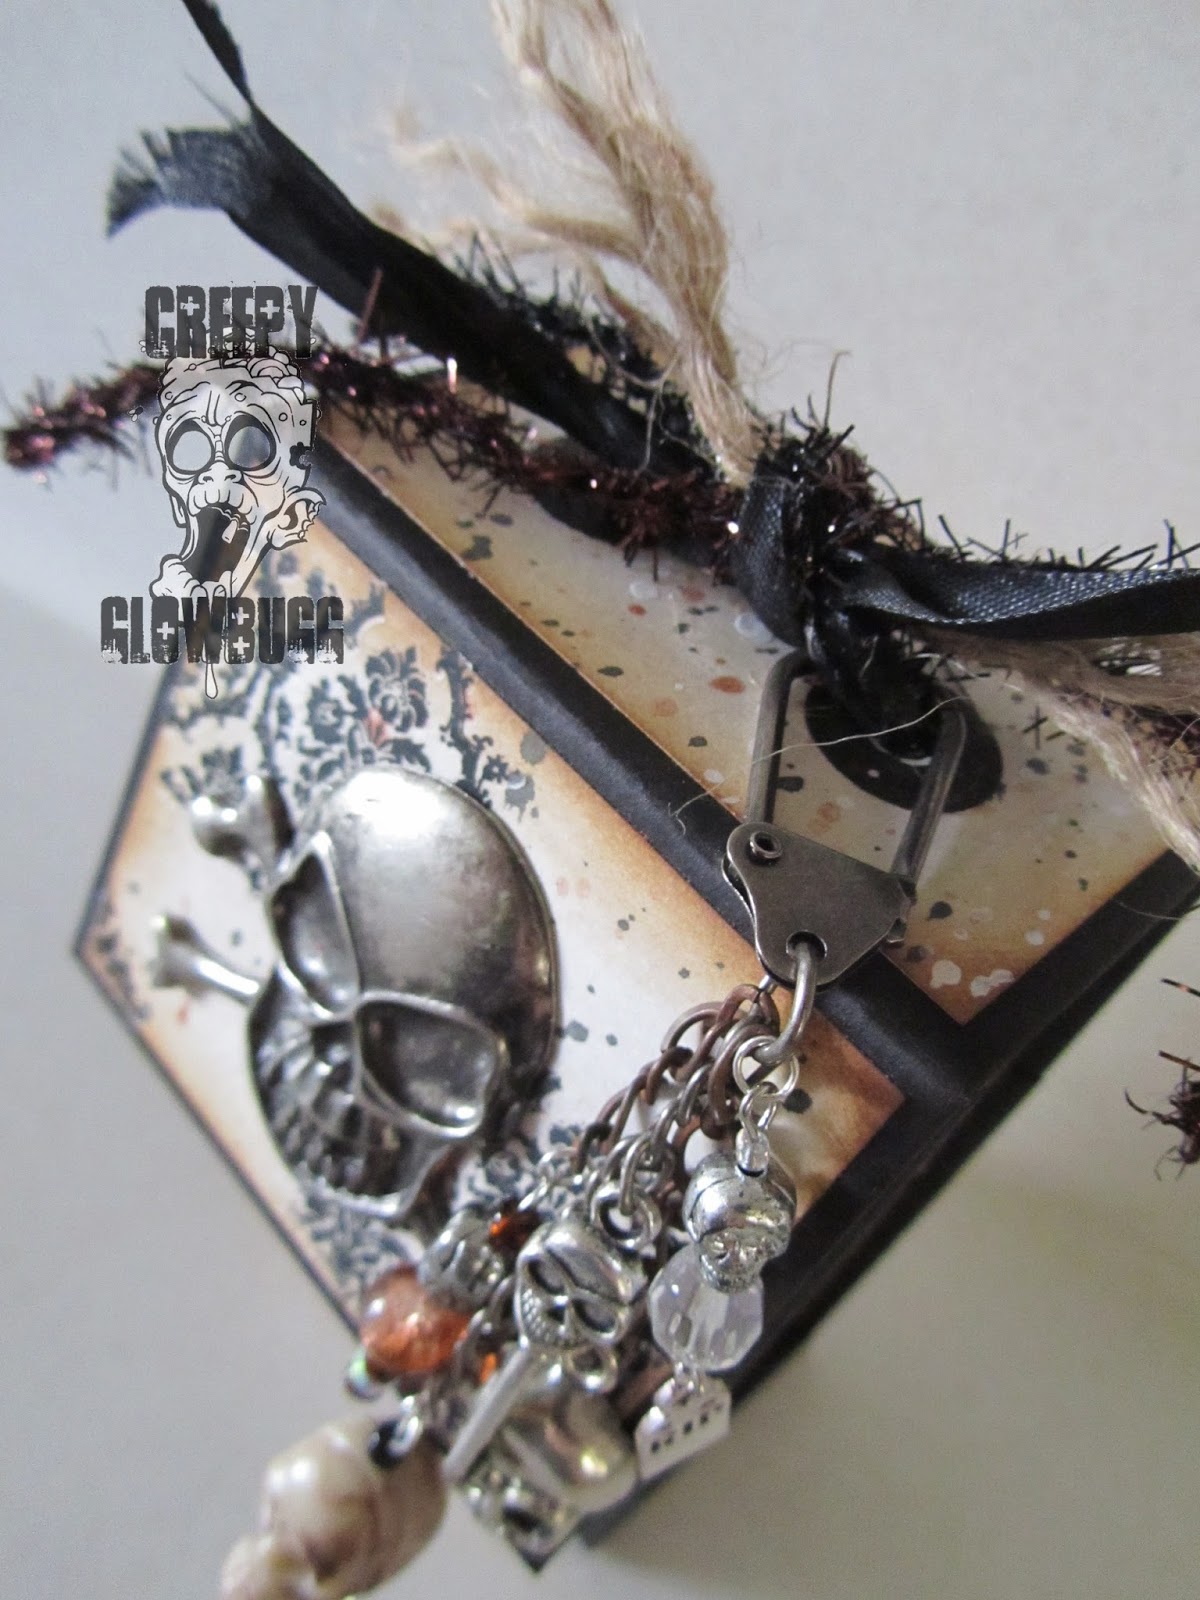
use up some of my hoarded skull stash. Like that big, metal skull, for instance.
One of the crossbones broke off of it, and I have been moving it around in my
stash for well over a year (or two). It feels good to finally use it.  

I created my own charms for the dangly bits.

Meaning, I strung them, and added the beads to the TH swivel thing. 
I think it adds a nice touch to the album, while still keeping it masculine.

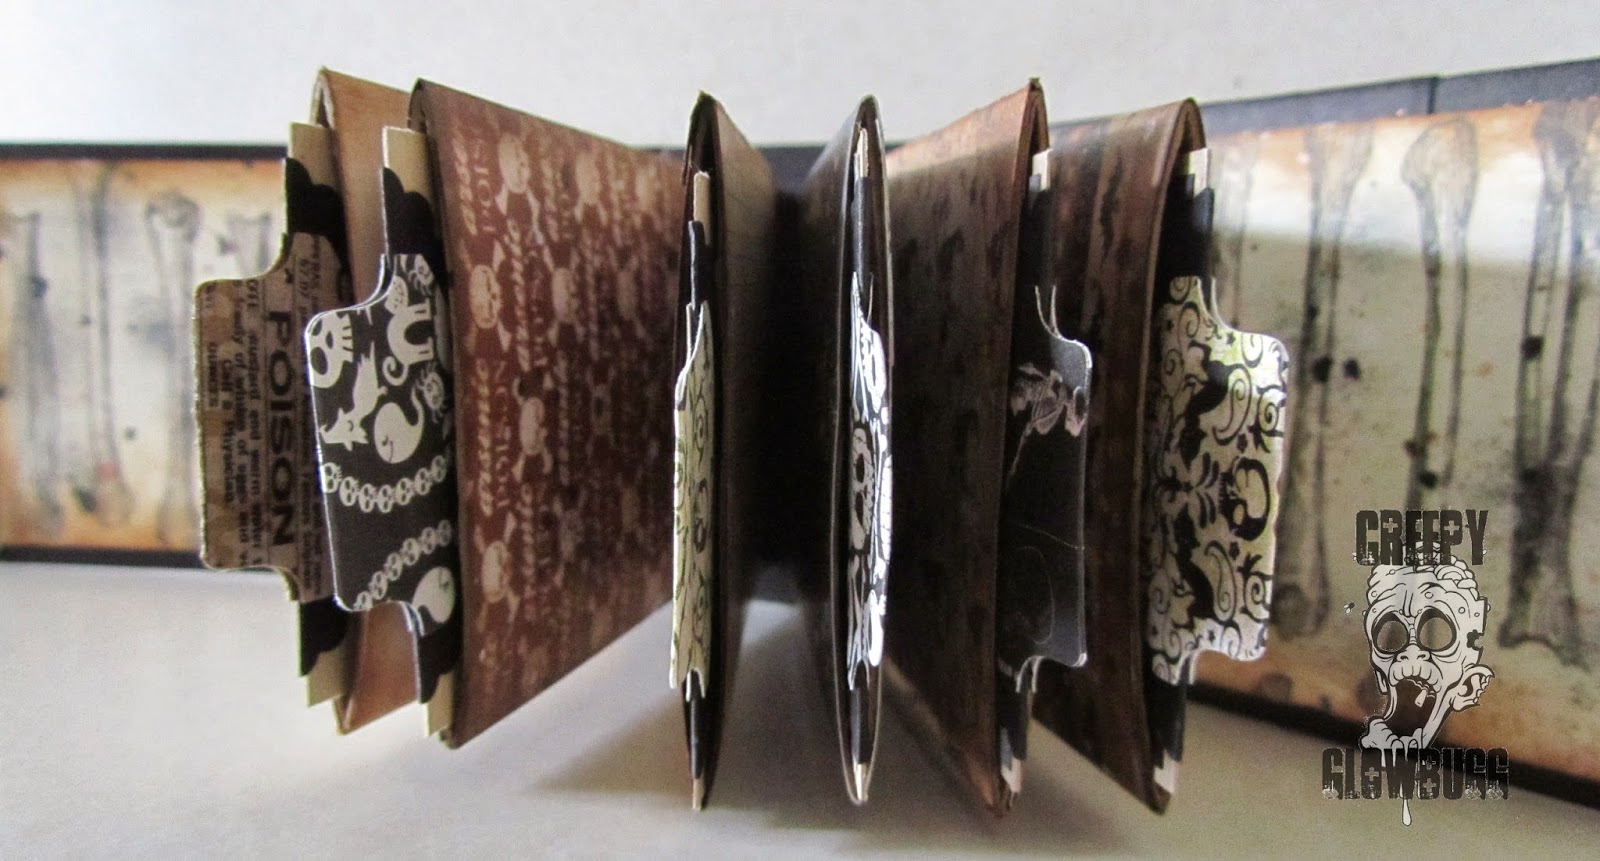
Side view of the innards.
There are six, flattened, toilet paper tubes in there, 
each with it's own removable tag.
The binding hinge is really the best part of this project.
I'm sure I'll be using it again in future projects.
The video is worth watching for the hinge alone.
Super simple, but so effective. 

Here is a nice shot of the technique I used for all of the dp panels,
and the internal tp tubes. I was trying to give everything a uniform feel, 
without being too, 'matchy matchy'. After edging the panels with vintage photo
Distress ink, I used black and white Dylusions Inks and Perfect Pearls in copper.
I just splattered the inks, as opposed to spraying them. I like the dingy,  
distressed look it gives everything. Plus, a little shimmer never hurt anyone.  

Here are the tubes with their tags. I was able to use up a bunch of scrap paper,
which is always a plus. I am currently trying to figure out how to better organize
my paper scraps, so I can use them up faster. I think I should sort them into
solids and prints, and the Hallowe'en papers should have their very own bin.
  
I used my SU small, oval scallop punch and folded it in half,
and glued it to the top of each tag. Then, I used the SU tab punch, to add the nice
 little tab at the top.  
  
Overall, this was a pretty straight forward project. The tutorial was easy
to follow, I was able to use up six tp tubes, and now I have 
this nifty little (3" x 5") tag book. 

I really enjoy making books from scratch. 
I may have missed my calling as a book binder. 

 I'd like to enter this mini album in the following challenges:
 (I went with a left side, diagonal, using metal, 3D, and sparkle) 

Thanks for stopping by!
  

Sunday, May 26, 2013

Anything Poes, and then some

Finally, I am able to play along with my fiends
at Quoth the Raven, Nevermore challenges!!
With a style all their own, they deal only in the 
masterings of Mister Poe, and none other! 

I have been itching to use this wonderfully rendered image of Mister Poe
by Rick St. Dennis. It's available here.
I wanted him to be the main attraction, so I decided on an ATC.

After printing Poe out on kraft stock, I used Distress Inks and an aqua 
pen to give him some color. I used a "nevermore" stamp that I got from 
Viva Las Vegas via an Etsy retailer. Weird, I know.

It seemed a little plain, so I felt the need to add some blood splatter.
I embossed it with some cool, but unused for far too long,
 red tinsel embossing powder.

Lastly, I added the witty sentiment from Viva Las Vegas and some more
sparkly blood splats.

I'd like to enter this in the following challenges: