Saturday, June 29, 2013

June Weddings and Red, White, and Blue

Playing a little bit of catch up here.
 I have some super cute ATCs to show you for this week's
June Weddings.
Our sponsor is 2CuteInk. She has the cutest images!!!

A nice close-up of all the elements that went into this ATC.
I flocked the Mister's bow tie, Stickled the Missus' flowers, twisted some black wire
for their stems, added a paper leaf, some cheesecloth, some rhinestone ribbon, 
and a handmade polymer clay heart. Whew!   

I kept this little cake way more simple.
Colored her with Copics, added Stickles to her fancy frosting,
and added a polymer clay heart again. I cut off the original one
while fussy cutting on both images.
  

I also added some black wire for the cake stand feet. 

This tag is for the current challenge over at Dilly Beans:
Red, White, and Blue/Patriotic.  

When my feeble attempt at using stencils failed, I opted for some layering of
spray inks, die cut stars, and some teeny star brads. I also played with some
red and white embossing powders.

This image is named after my dear friend, Jenn. She is a major
player on the Dilly Beans DT, and she runs the WW ATC challenge,
among other DTs and schtuff. She's rad, and I adore her. 
There are a bunch of new images available over at Dilly Beans that you should
check out after dropping by the challenge blog to check out all of the eye candy. 

Well, it's supposed to be in the 100's all weekend, so I'm gonna get
busy before I need a drip pan! Fat melts, ya know. 


Friday, June 28, 2013

I challenge you to a duel!

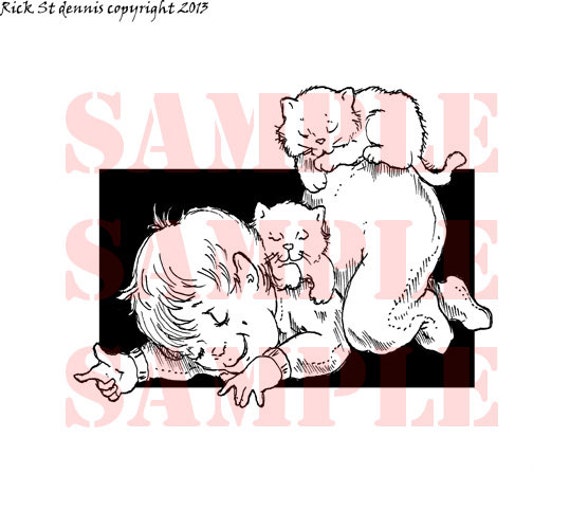
Cat Nap digi stamp
A few weeks ago, Rick St. Dennis released a sickeningly
sweet image called, "Cat Nap". So precious and mainstream.
I was feeling a bit frisky when I saw a sample card 
my fellow EDT member Monique made for the image.
I dared her to creep it up a bit. I love transforming images, 
and haven't had a go in a while. Even our other EDT Sister, Alison
wanted in on the make-over action.   

Now the logical plan of attck would be to work on the kiddo.
He is pretty easily transformed just by the use of color, but I wanted a bit
more of a challenge. Those kitties look like they could be fun....

    So glad to have those Copic multiliners. They made the transformation
much easier than a Sharpie. I decided to go with mutant eyes and horns
for the kitties. The talons reminded me of a sloth, which I thought was cool.

After transforming the kitties, I was at a loss as to how to change the kid.
I decided to go with the idea of a nightmare that hasn't struck just yet.
That way the boy could stay the same and just the felines had gone
terribly feral. I hand wrote the "Sweet Dreams" with a multiliner.

Another of my favorite sentiment stamps, coupled with a kitty sticker border,
and an eyeball sticker from MS.

I received this cute, black paperbag scrapbook from Barb, months ago, and have
been plotting how and when to use it. I have decided to put together a MoNsTeRs
scrapbook using a bunch of RSD images, old and new. Stay tuned for more installments.

Drop by the Airless Chambers blog and see what Monique and Alison did with
their sleeping baby and kitties image. Not for the faint of heart though....

Wednesday, June 26, 2013

Danse Macabre Throwdown

Well, skeleton crew that we are, we made it!
Haunted Design House is back in the 
Just me and  fellow Minion, Donna this time around though.

The chosen theme for this month's challenge is 
"Danse Macabre" or the "Dance of  Death".
Last month's throwdown winners, Airless Chambers  chose the theme.
And what a wicked theme it is!!

Growing up and listening to metal bands, I immediately thought of
a song by "Celtic Frost", aptly named, "Danse Macabre". 
Well, it was sort of a song. More like track from a
creepy, Satanic movie soundtrack.
Here is the YouTube link, incase you're feeling inquisitive.
But, that was my inspiration for my throwdown piece.  
I tell you this, thinking it might make some sense now, but it probably
just makes me seem that much more bizarre.

I have been collecting old baby dolls lately, when I visit the thrift shop.
I felt kinda embarrassed at first, with this filthy baby doll at the check out.
But now, I feel like I'm liberating these poor, neglected souls.
After apologetically removing his appendages and head, I gessoed, 
and then painted the head with various acrylic paints.

 
Made quite few rookie mistakes,but it all ended up working well in the end.
I applied TH Distress Crackle Paint in Rock Candy, (rather thickly at times)
for the final crackle effect. 
Rock Candy is now my "go to" crackle medium.  

Then, I got the bright idea to use old dictionary pages for some punches
later. I used some homemade Distress Ink sprays, but didn't factor in the
unexpected humidity and rain we were having. It took what seemed like
forever to dry, but the end result was awesome!

Still damp!!! I cannot punch damp paper!!!!

I decided that I needed a crown, so I fashioned one out of old jewelry and
some grungeboard.

Ah! The dictionary paper is finally dry, so I use a piece to add my  required, 
stamped image. I used this cool, Stamper's Anonymous stamp that was gifted to me. 

I also started punching stars for the baby's collar.

I hand wrote the quote, "The Dance of the Dead unites us all!" 
on an old dictionary page. Basically meaning, that we all are on the same level once we die.
No one cares who was rich or poor when the Reaper comes a callin".  

I wanted an old, corroded, gritty feel to this project. 
I feel that the use of resin sand achieved this effect quite well.


I mixed it with black acrylic paint to save myself the step of painting it
black later. This way, once it was dry I could go directly to the highlights. 
I used metallic acrylic paints to give it all a metal feel.

Here is my other stamp! I actually used two on this side, but the winged skeleton
under the Deceased stamp is super faded after all the painting and stuff.
I used my cherished, Meer Image stamps.  The very first scrapbook expo I ever
went to (ages ago), is when I found Meer Images and the talented artist behind them,

My little baby head needed a collar, so I created one out of distress inked
dictionary pages, and a star punch. I felt that a circle or a scallop wasn't
going to be pointy enough for my little friend. The star gave the perfect
amount of sharpness needed.

 It kind of mimics the points of the crown.
I added some more resin sand to the crown, along with a
handmade polymer clay skull and more acrylic paint.

Well, here is my nut can, turned gritty commentary on Death.
Drop by HDH see what kind of wickedness Donna cooked up
for her entry. We kinda ROCKED it!!!

Voting starts on Thursday, and we'd really love it if you voted for
your favorite project from the team who deserves it the most.
Go to Smeared and Smudged ning group to see all of the entries
and to cast your vote. Voting ends Saturday at midnight.

Tuesday, June 25, 2013

There is still time for Symbols of Peace

This week's Wicked Wednesday ATC challenge theme is
Symbols of Peace.

We are sponsored by Digi Darla, who
provided this me with this cool feather image.
I colored the background using Distress Inks and 
a peace symbol stamp. I spritzed it with water, and crumpled the
paper after stamping it. 

I couldn't help myself with this one.
I have a sticker in my craft room that says,
"Peace. Love. Zombies.". 

Plus, I know how much of a peace loving hippie my dear friend,
Jenn considers herself. This was my way of supporting her
cause. Cause it was funny!!! Ha!!
And when else can I use that day-glo peace sign ribbon?!

There is still some time to play along with us at 

Saturday, June 22, 2013

Pick a skin tone, any skin tone!

I guess it's high time that I share some of my Copic skin coloring
techniques and ideas with you.
I have chosen to use the lovely RSD Sparkle and Glitter freebie image for June, 
Desdemona .
I begin by printing her on white Papertrey Ink paper. I pretty much use
Papertrey paper exclusively. It's great for blending Copics.
I start with E02 in the darkest shadows, like the cheekbone, inner ear,
side of nose, breast cleavage, under lip,and under the jawline.

Next, I use E01 to blend out the shadow a bit.
I basically go over the same spots, but blend out a bit with the new shade. 

Now I use E00, using the same technique. Just keep following the 
other colors, while blending out into her face more with each new color.

Finally, I use E000 to fill in all the highlights and to blend all of the
layers together.
This basic technique is how I color all of my faces.
Regardless of the color scheme, this is how I always color, going dark to light.
I may come back in with another darker shade (in the same color family) to
add more depth and shadow, if I'm not getting enough contrast.   

Here is Desdemona in (my favorite) YGs - 17, 23, 03, 01, 00, 000 
and Warm Grays - 6 thru 1. I use the colorless blender as might lightest shade
to blend all of the grays for an even and smooth blend.
You can click on the pics to see them closer if needed.


Using B06, 04, 02, 01, 00, and E39, 37, 35, 34, 33, 31, 30.

Using (another favorite) BG15, 13, 23, 11, 10, 000 and 
RV14, 13, 21, 10, 00.

And lastly we have Desdemona in V17, 15, 04, 12, 01, 000 and
in R29, 27, 24, 22, 21, 20.
She reminds me of a character from the old Star Trek episodes 
I used to watch with my Dad. I think that lady was either blue or green. 
The colored skin gives her an entirely different look each time.
Very exotic! And kinda alien-like.

I'll be back soon, with another tutorial on her eyes and make up,
and finally, a third tutorial on coloring her gorgeous hair.
Stay tuned!

Friday, June 21, 2013

Major brain fart....

Since my Mom passed away back in March, I have had a rough
time getting my shit together. I try to stay busy, but to the point
where I have numerous unfinished projects throughout my house.
I still have artwork, photos, and masks to hang in the living room.
I have cloches to fill and display my new artwork/sculptures.
I have quite a few pieces of statuary awaiting their impending 
zombification. Not to mention the many DT projects I have in my
head, but have yet to come to fruition. Scattered, is putting it mildly.
So it's no wonder that I have forgotten to post some really cool 
DT projects that made the deadlines, but never saw the light of day
on my personal blog. Again, hours go by and the stuff I was supposed to
do never gets accomplished. Depressed much? Grrrrr.
Anyhoo, here are some projects I have completed in the past couple of months.

This was a Mother's Day card that I created for the
now closed, Summertime challenge at Dilly Beans.  


I made this for a dear boy named, Griffin. He has had a life changing
surgery and needs good cheer while he's recovering in the hospital.
If you'd like to send a card to Griffin, check out this post.

This one went to Griffin as well.

This was for a previous Black and White challenge for Dilly Beans.

I am a huge fan of Barbara, over at Forgotten Scraps,
and what she can do with some Copics and a (yikes!) Tilda image.
Really, this lady is muy talented! Check out this post,
and this one, and this one, too!

So, when Barbara invited me to be a Guest DT for the recent 
how could I refuse?

I think Barbara was hoping I'd try to transform these images like she
does with the Tilda's (and these as well), but I was too intimidated. 
Maybe I'll give it a shot in the near future.

Here is a tombstone from Smeared Ink who was sponsoring
I used Liquid Applique for the fingers. I like it!

I only managed to make a couple of Father's Day cards this year.

I used some cool Volkswagen stamps from Stamper's Best.
I colored them with Distress Inks. I was trying get that
vintage look. 
I also got a killer deal on a bunch of Tim Holtz goodies on ebay.
I really dig these tags. Very masculine.

This one was for the Birds, Eggs, Nests challenge at WW last week.

This one was for WW ATC, too. I used these cute owls from 

This is for the current challenge at WW ATC,
I used the feather from Digi Darla.

This one is also for the "Symbols of Peace"
challenge at WW ATC

I just had to do it.
I snagged this image off the internets.

I think this may have caught me up to current projects, yet to be posted.
Thanks for dropping by.

Keep it Creepy.