Showing posts with label glow in the dark. Show all posts

Thursday, October 15, 2015

Gettin' smudgy

It's time for the newest installment in my 
Smeared Ink board book.  

For this page I have used one of the newer images called,

She's pretty amazing. I saw her as a Wizard of Oz witch,
so I kept her skin tone very green. And then it only seemed 
logical to give her red hair and dress her in purple and black.
Standard witch color palette.   

I received some glow in the dark embossing powder for my bday.
Thanks, Dani. How the hell did I not own this stuff before now?!
It is AWESOME!!! 

I used a fabulous red rubber skull pile image for 
the background which is nearly invisible in the daylight.
But once those lights go out, it's full on skullsville, man.
I also learned the hard and messy way that once you gesso your
substrate, heat emboss an image, and add metallic Gelatos, you can't rub 
the surface with a baby wipe or you'll remove all of the Gelato. Not the case
if your substrate is not gessoed or sealed. The pages of this book are kind of glossy
to begin with, so either way I was going to lose my Gelatos on this technique.  

I added some Crackle Accents to a witch tag, and then went over it with
Hickory Smoke distress ink to show off some of those cracks. 

I am really loving the direction this book is going.
It's going to be awesome once it's all done.


Be sure to check out the killer Ink-tober Sale going on at Smeared Ink.
And please stop by the Smudgy Antics blog to check out the incredible
eye candy created by my fellow DT sistahs.
  

Wednesday, September 19, 2012

"I'm melting.....!!!"

This week at HDH we are drawing our inspiration from
melted wax, candles, witches, melted flesh. Any type of
Halloween/Gothic themed melted musings will do just fine.  
 
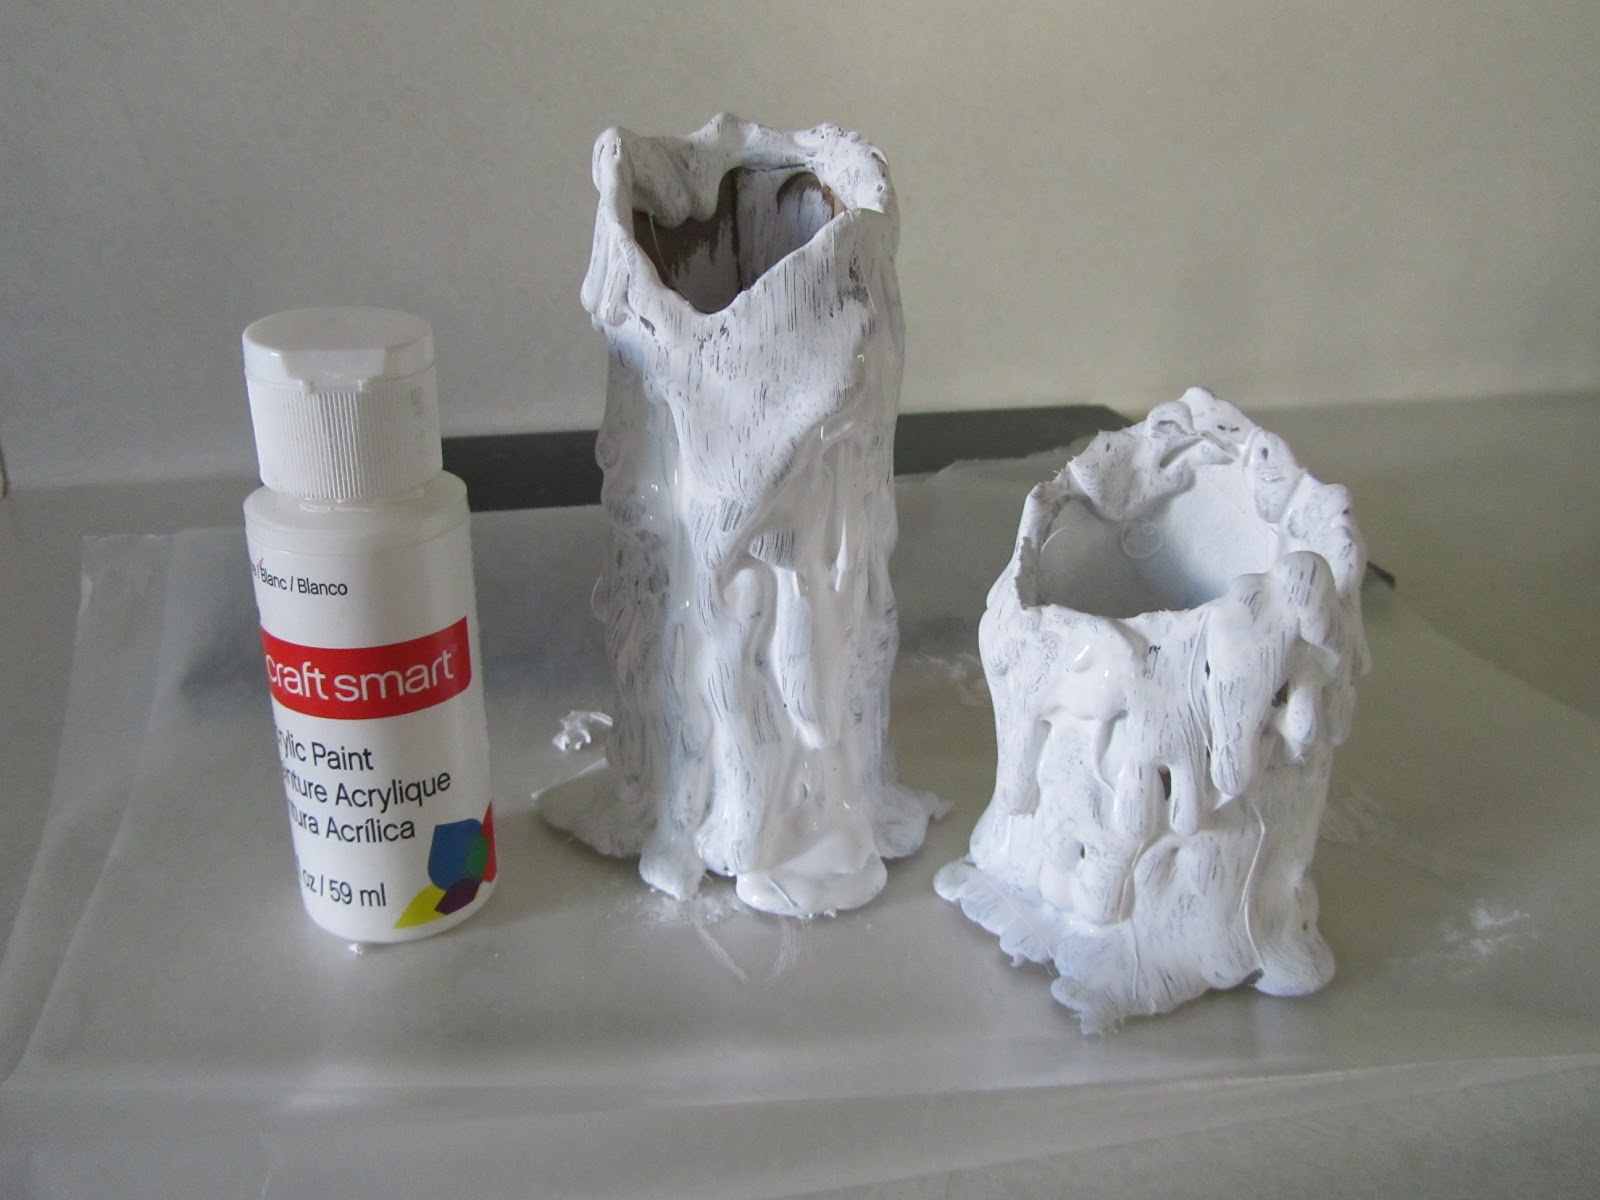
I opted for a pictorial tutorial of some glue gun candle props.
 
 
Step 1:
First step is to gather your materials.
You will need a high temp glue gun and LOTS of glue sticks.
Empty paper towel tubes and/or toilet paper rolls.  

While the glue gun was warming up, I ripped the tubes to a desired
shape and height to mimic melted candles. 

Once the glue gun is warmed and ready, start covering the tube with glue.
Be very careful not to burn yourself and work over a protected, heat resistant
area.

I will be very honest at this point, and state that each fake candle takes
about 4 or 5 glue sticks EACH, to cover it to this stage. If you like the waxy look
of the glue you may want to keep adding glue until the tube is completely
covered. Once the glue hardens, it appears more opaque and wax-like.
I usually prefer to stop at this stage.  

Since I am running a bit low on glue sticks, I decided to take the next step and
paint each candle with white acrylic paint. The first time I saw this craft, it included
this step, but I haven't gone this far before. I'm figuring it just needs a base coat. 
Be sure to paint the inside of the tube as well.

After a single base coat of white, I then add multiple coats of fluorescent
green and yellow acrylic paint. My son walks in and says, "Ya know when you go to those run down carnivals and you go on the Haunted House ride? Your candles look
like the hokey black light stuff they have in there".  
 
Thank you!! That is EXACTLY the look I was going for!!
Perfectly heinous, low budget, haunted house props!!!
 
Oh, and I slathered on a healthy dose of glow in the dark paint too!!
I found my real fake tealights (not those weak ass Hello Kitty ones)
and they work excellent!!
I am quite pleased with my melted musings this week.
 
Drop by HDH and check out what else the Minions conjured up
for this week's challenge.


Thursday, March 17, 2011

My head hurts!

Here is my latest creation for the Macabre Monday
challenge at Haunted Design House.
"Alas, poor Yorick" is the theme and the challenge
is to use some skulls, or just one in this case.

I used a paper mache mask from Mike's, painted it with
white and glow in the dark acrylic paints. I cut the hole
out quite effortlessly,  with a craft knife and then painted the
entire mask with some silver and sapphire pearl paints. I dabbed
the wet paint with a wet paper towel to wipe away most of the paint,
just leaving some shadows. Painted on some cracks and now
it's time for clay.

Next up are the clay props. I used alot of glow in the dark clay
for the fingernails and the eyeball which all glow quite fiercely,
but I couldn't get it to photograph at all.

Lastly, I glued everything into place with some
killer Super Glue craft and modeling glue from the
Dollar Store.
I'm not sure what I'm going to do with it now, but
it is a mask and all. I'll probably find a place to display
it somewhere....

Just a quick random note here regarding the
"Face Off" finale on the Syfy channel last night.
WTF?! Conner?! Really?!
I was so mad!!!!! I think I still am mad!
My first pick to win was immediately Tate. That guy
is insanely talented and showed that throughout the show.
His finale piece was phenomenal! I loved Gage's creation also
and thought he was the other forerunner for sure.
Conner is very talented, but he seems a bit strange and
safe in his concepts. Syfy is accepting apps for the new
season right now. Wish I had a better knowledge of
prosthetics and make up effects. I'd enter in a heartbeat!

And now some music for St. Patty's Day...