Showing posts with label steampunk. Show all posts

Saturday, January 6, 2018

New year, new art

Well, well, well, 
look who's dusted off her keyboard and is posting
in 2018!
I haven't been able to create much over the last year, but
I made it a priority (of sorts) to create some card art when
my brother from another mother, Mark Gould told me he
had launched a set of stamps over at Chocolate Baroque.
And not just any stamps, but some really lovely art
that is reminiscent of tattoo line art with a Steampunk flair.

First up is a card I made for my father's 70th birthday,
using "The Gent", image.  
I love how you can really make the image for any man,
of any age, just by adjusting your color palette.

Since my father is now 70, I used distinguished grays to 
 color his hair and beard. I have to say this gentleman does have
more on top than my dad, but he still enjoyed the card and
the similarities.

This gorgeous lady is called,
I am pretty chuffed with how this card turned out. 
Not too bad for a dusty, old chick.
Me, not Gypsy Rose.

The size of these stamps allows you the freedom to get really
nice blends and should be a dream to color in any medium.
I chose my papers out of my coveted Graphic 45 stash of
Rare Oddities, and let them dictate my Copic coloring palette.

There are two more stamps in Mark's current line, so be sure to pop
by Chocolate Baroque and check them out. They are currently on sale,
and you get even more bang for your buck if you buy all four stamps.
You're welcome.
And do yourself one more favor and pop by Marks's blog, or follow him
on face book to see all the cool schtuff this guy's doing. He's all over the
place teaching, and creating. Quite a talented chap.
Again, you're welcome. 

Tuesday, June 7, 2016

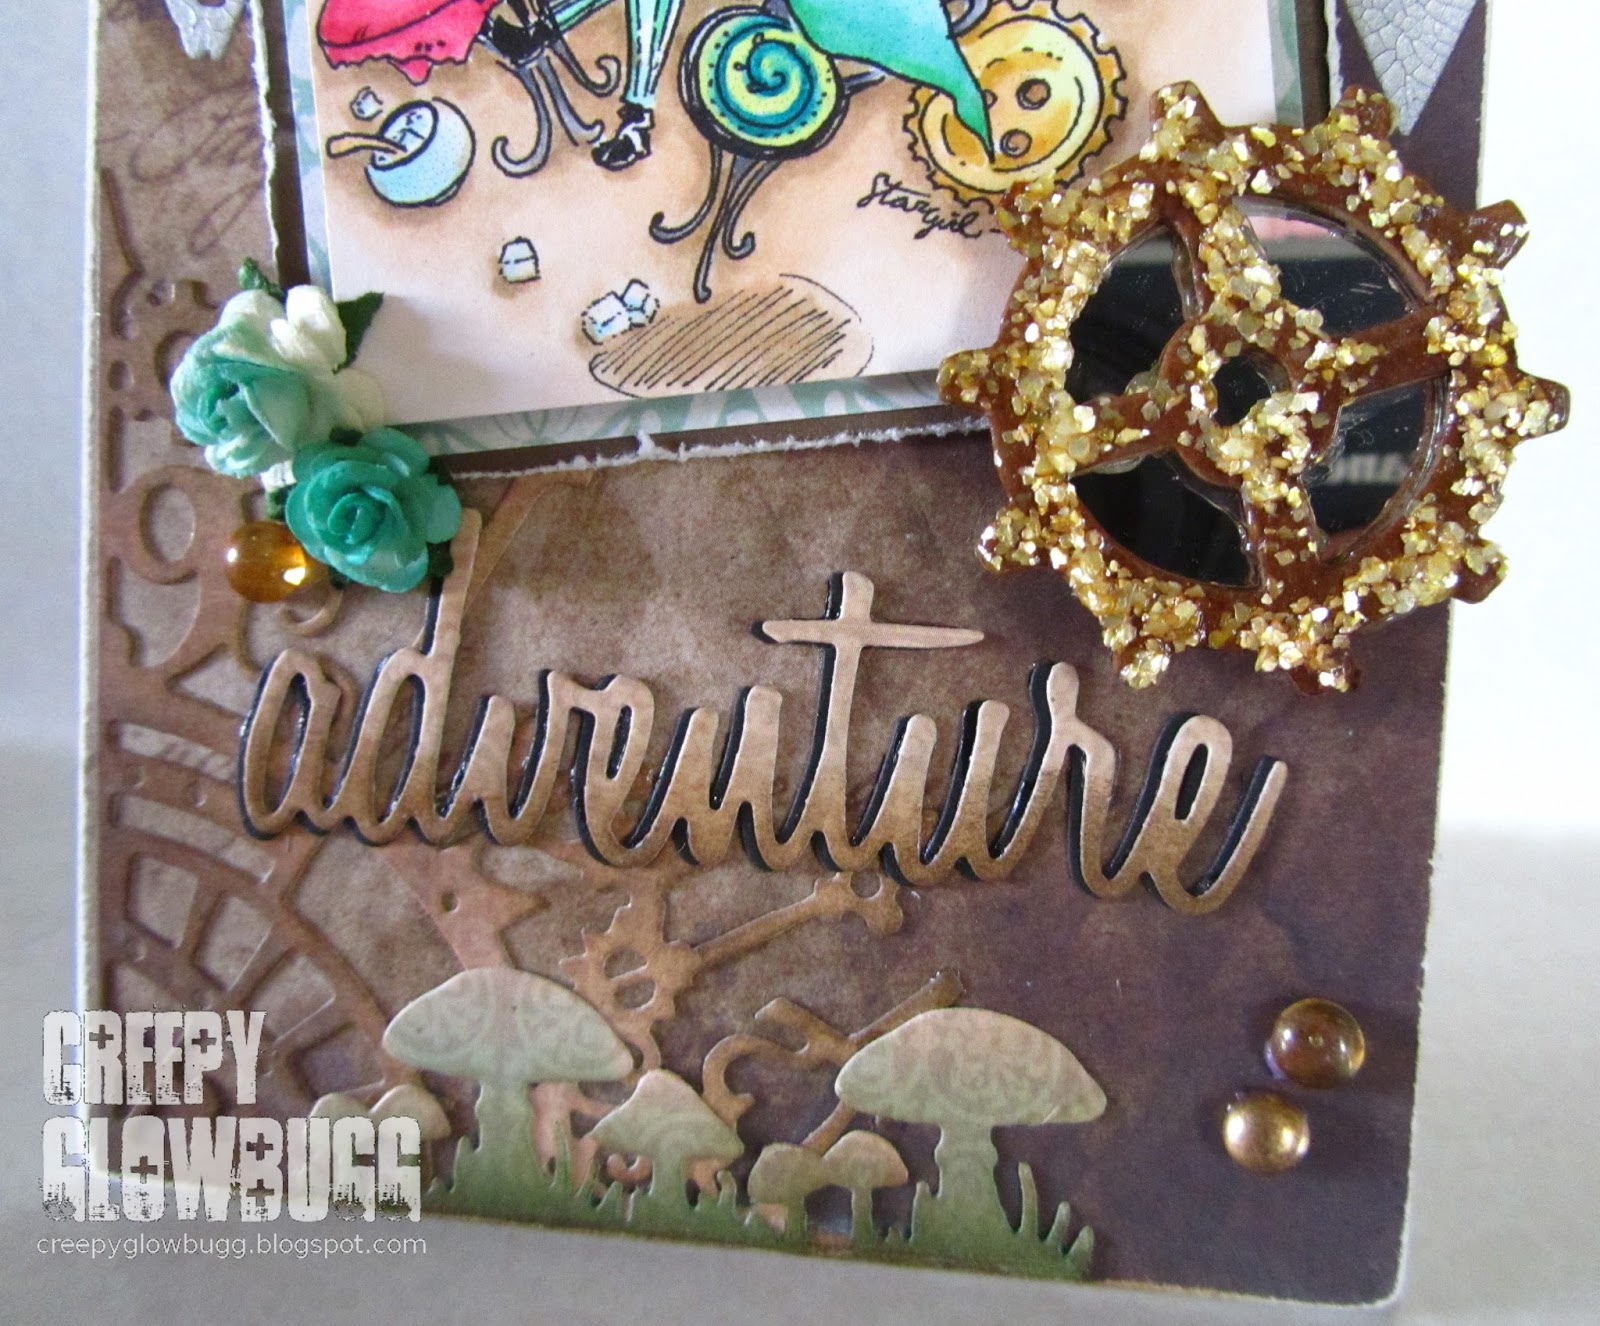
Alice in Wonderland Mixed Media

I have been a fan of the artwork of Sarah aka Star
for quite some time. Like many years ago when I first saw her 
Chibi artwork on the Spesch Designer Stamps site. 
Now she has her own shop selling her awesome artwork directly at
I had to grab the Alice in Wonderland images and make something 
cool with them, so I made a wall hanging that I'm pretty proud of.

I am super happy with how this turned out.
I began with a drawer insert I had that served as a perfect substrate.
I gessoed it and adhered some distressed vintage feeling designer papers. 
Then, I stenciled some diamonds on it using Finnabair platinum crackle paste,
keeping it kind of random. 

I colored up the adorable Alice image in blue greens and beige shades
of Copics. I added in some gold tones and a hint of red, too.
I matted the image onto some distressed background papers to add more texture
and contrast.  

I used some metal embellishments along with various die cuts from Tim Holtz.
I covered the clock and gear die cuts with Golden Pearl Mica Flake and colored it
using TH distress inks. I also used some gold and amber shades of dew drops, 
and some hand colored paper roses in blue greens, as well.  

Then it was the Mad Hatter's turn to get some
color. More beige and blue green shades of Copic coloring.
I added some pops of red to give some nice contrast too.

More die cuts, roses, and dew drops were added to finish it all off
and provide some balance to the entire piece.
I made this for my bestie and she loves it. It now hangs in her craft room.

Thanks for dropping by today.

I'd like to enter this wall hanging in the following challenges:
hope it's not too cute for you guys


Wednesday, January 28, 2015

Steampunk Puzzle Art

A dear friend purchased a children's puzzle with pretty large pieces.
She sent puzzle pieces to various friends and asked them to customize the
pieces and send them back so she could put them all back together in
one large art puzzle. Kinda like ATCs, but they will all interconnect.
Cool, right? The only limitations are your edges. You don't want to overlap
onto someone else's piece. 

Wanna see what I did? 

I got two connecting puzzle pieces to work with. This allowed me to expand
quite a bit, and make a pretty good sized piece. 

I reached for one of my unused Stampotique stamps
called, "Oh Boys". I felt these guys deserved a good inking.
And in keeping with my 2015 goal of using any previously
unused images or products. I'm doing pretty good so far.
The boys fit perfectly in the little chipboard peephole/label that I added some
plastic packaging to the back of, to mimic glass. 

I used different embossing folders (diamond plate, rivets, gears)
to give the industrial/Steampunk feel I was going after for this project.
I used cardstock and some aluminum tape I picked up at the $Store. 
Worked great! I colored it with various alcohol inks, and then splattered some
black and white Dylusions on everything to make it really grungy. 

I used Crackle Accents and Glossy Accents on a few gear die cuts,
and used the Glossy Accents to glue down the actual metal bits I used. 
I mounted the peephole using foam tape for dimension.
I'm pretty thrilled with this piece. Great fun to create!
Thanks for the chance to play along, Kristy. 

I'd like to enter this in the following challenges:  
Stampotique Designer's Challenge - New Year's Resolution
(to use previously unused stamps like "Oh Boys!")

Friday, January 23, 2015

Look who's on a roll!

Not bad. Five posts already this month.
So far so good with keeping up with posts,
despite the fact that no one hardly seems to stop by
very much anymore. That's cool though, as I look at this
blog as an indelible record of my thoughts and artwork from 
this point in my life. More for me and my kid than anyone else.
But it's still nice to think folks will drop by and enjoy what they see
and read here.
And as usual, I digress...

I made another ATC. I really enjoy making these things.
The current theme over at Wicked Wednesday is
Pink, Black, and White.

Pretty sure that I nailed it. 
Definitely one of  my favorite color schemes.

In keeping with another want for the new year, I am using 
a previously unused digi image. This one is from the now defunct,
Birdie Brown. I adore Torico's simplistic, and sweet style.
I'm sure you'll be seeing more of her art, as I have amassed quite a collection.
Yes, another "collection".
I kinda panicked when she announced she was closing her shop...

After coloring this sweet image with Copics, I added some
white highlights with a Gelly Roll pen, and some Fruit Punch 
Stickles for sparkle. I also added a couple of steampunk corner
accents, complete with rhinestone centers.

Thanks for stopping by today.
I really do appreciate those of you who stop by, and especially
when you take the time to leave me a comment.

I'd like to enter this in the following challenges:


Thursday, April 17, 2014

New Release Hop for Smeared Ink

I have another new image release from 
to share with you today.

I have chosen to use "Loved Alone Octopus" for my card.
I thought he would be perfect on a Father's Day card. 
One down, three  more to go.

I was able to destash some TH gears and cogs that I had lying
around from another project. The colors matched, so why not?
I popped the gears up on foam dots for added dimension.

I colored this dapper fellow using Copics and tried to fussy cut 
him out with shaky hands. He looks a little rough in spots, but 
it is handmade, after all.

The image I used is from the "I Loved Alone" set of images
now available at Smeared Ink.


Feel free to hop around and see all of the awesomeness that has been
created using these new images. Plus, there is a giveaway involved as well.
Be sure to leave some blog love on each DT's Smeared Ink post, and maybe you
will win the entire set of images!


Monday, April 14, 2014

Steampunk Junk for Macabre Monday

Today begins the second week for Haunted Design House's
StEaMpUnK JuNk.

 This clever theme was all my idea, and I had an ulterior motive behind it.  
I have had this doll baby head (in the middle) from a while back, and I have been
dying to get back to it. I really love transforming these dolly heads!
And I like playing with polymer clay, and getting messy with paint, too!
Yes, this is my therapy.

So, I offered up a Steampunk theme for HDH, 
and here ya have my finished Steampunk Junk Doll Baby Head. 
Or as I like to call him, Sir Cornelius. Don't know why, I just do. 

"Corny" started out as a thrift store doll. I liberated him, washed him up,
and gave him facial hair using polymer clay. I painted him with gesso,
and then gave him a bronze base coat of acrylic paint.
I used some bright green cogs from a tape runner refill, a rubber cap
for a pipe or something (Hubs donated it), some metal washers, and
a doll eye wood cut. I'd say some of that is considered junk.
My problem is, I see potential in so much crap, I'm starting to fear
an intervention is in order.

Anyhoo,

I used some aluminum tape I picked up at the dollar store (score!),
embossed it with a TH Riveted Metal folder, and wrapped it around 
the top hat, aka rubber endcap.

I gave the hat a coat of black gesso, and then swiped some
Inka Gold in silver over the raised bits. Really brought out the
cool texture. I really like this folder. Well worth the time it took to find it.
I also added some distressed metal wings, another distressed washer, 
and a smoky rhinestone brad to the hat to make it all, "fancy schmancy".
I love using up my old stash, and found items. Makes me feel so good to recycle
the cool schtuff I acquire and collect.    

I attached a TH attacher thingy to Corny's ear, and this allowed
me to attach the monocle to him in a permanent way. Considering he
doesn't have a breast pocket, I had to make do with what he did have. An ear. 
I attached a chain, and a gear to one end, and the other end to the monocle.

That monocle, with the oversized doll eye wood cut is my favorite part of this
project. I used Glossy Accents to adhere the eye to the metal washer, and to 
give it the appearance of an eyeglass. I'm a sucker for wonky eyes.
I accented his facial hair using more Inka Gold in silver.

I used a TH tag, bent it with a heat gun and sheer force,
distressed it and attached it to Corny's neck with a couple of chains.
I attached a distressed tag onto the end to give it an industrial feel.

And there you have it.
My take on the Steampunk theme.
I'm rather proud.

Thanks for stopping by!  

I'd like to enter this project in the following challenges:


Thursday, February 13, 2014

Just a quickie or two

Since getting our new puppy, I have found it hard to locate
my mojo. I need to keep checking on him to make sure he isn't
getting into trouble or peeing in the house. He's pretty much potty trained, but
he still tries to eat everything he comes in contact with! 
That's another post, for another day... 

I have made a few things that haven't been posted yet, like
this cool, Steampunk-ish tag. This was so much fun to make! 

Got this great stamp from Pink Flamingo on Etsy.
It's called, "Otto's Sweet Ride", by  Brian Kesinger.

I added a few TH stamps and some random cling stamps. Then, I felt
the need for TH washi tape. Finished it off with the metal wings,
colored with alcohol inks, and the compass brad in the middle. 
I should totally do this more often. I really like the style of it. 
Whatever that style is.

I was also in the mood to alter something. I used this cardboard tray that 
our neighbor used to give us holiday cookies. 
Hope she wasn't expecting it to be returned to her.    

The first step was to get rid of this festive holiday brightness.
Only seemed like black gesso would do the trick. I love that it covers in
pretty much one coat. 

See? Looking better already! 

And now the decorating has begun!
I raided my collage scraps stash and came up with some cool bits.
I applied them with matte medium, and then used another coat to seal everything.

Here's a cute Nosferatu image from the interwebs, along with some die cuts and TH rub-ons.
I also added the nautical star brad for fun and a punch of color. 

Here's the matching version of The Creature from the Black Lagoon,
along with another rub-on and another Pink Flamingo stamp, stamped
onto an old dictionary page.

I have decided to use this to hold all the digis I currently am trying to color,
or want to color in the very near future. I always print out my new digis
right after I buy them, so I don't forget I have them. Lucky for me, my
husband's work printer uses the same inks as my home printer. I'm almost
guaranteed to never run out!

Thanks for stopping by!

Keep it Creepy!!!   


Sunday, September 22, 2013

I wanna be Steampunk Peg for Hallowe'en

The current challenge at Haunted Design House is
"Who are you supposed to be?",
and we're sponsored by 

I chose to work with the stunningly gorgeous

I would love to dress up in full Steampunk regalia
for Hallowe'en or any costume party! 

I used an EK Success web punch on a dictionary page, and daubed it with
some purple ink to match Peg's ruffles. I also used some Recollections glitter tape,
and some orange rhinestones for just the right amount of bling.    

Peg is colored with Copics, and Stardust Gelly Roll pen,
some Icicle Stickles were used on the netting of her hat.
Just a touch more bling. 

Thanks for dropping by.
Keep it Creepy!!

Wednesday, August 22, 2012

Who are you callin' a Succubus?!


Due to my (un)healthy obsession with television and my
(un)natural love of my DVR, I am officially a TV junkie.
I record so much TV every week, but I do manage to watch
some really cool and strange and funny shows that I would
probably miss if I had to rely on the antiquated way of watching TV.
 
One of my favorite shows to watch is "Lost Girl" on Syfy channel.
At first I wasn't feelin' it, as it started right after "Being Human" and I
had a hard time transitioning from werewolves and vampires, to the world of
the light and the dark Fae. Huh? Isn't that kind of the premise for "True Blood"? 
Anyhoo,
as result of my having a girl crush on "Kenzie" (the main character's sidekick),
 I was inspired for this week's challenge.
Yup! That was me!!  
 
"Who are you callin' a Succubus?!"
 
What exactly IS a Succubus you ask?
In folklore traced back to medieval legend, a succubus (plural succubi) is a female demon or supernatural being appearing in dreams, who takes the form of a human woman in order to seduce men, usually through sexual intercourse. The male counterpart is the incubus. Religious traditions hold that repeated intercourse with a succubus may result in the deterioration of health or even death.
In modern fictional representations, a succubus may or may not appear in dreams and is often depicted as a highly attractive seductress or enchantress; whereas, in the past, succubi were generally depicted as frightening and demonic.
Now ya know. 
 
We are sponsored by Kenny K who has such a talent for drawing hot ladies.
And he also draws some really cool guys and animals too! 
Kenny has generously offered up 2 digis of choice to each of the GTs this week!


I had a bit of a creative roadblock this week.
 No matter how hard I tired to keep in the dark, Gothic vein, the cards I was working on kept going in the vintage, faded direction. I even switched images thinking I could
darken up Jane Jettpack, but she turned out rather vintage in her over all feel.
 
Can you say, "Hottie"?!
 
I used an embossing folder for the red/orange card stock, and
aged it a bit with Distress Inks. I also used a cool new rubber stamp
and stamped it on the ivory stock using Distress Ink and then spritzed it
with water to give it that faded look. This is the first time I have used
this technique, but definitly not the last!
 
Thanks for dropping by and checking out my card today.  


Thursday, June 14, 2012

Hey there, Bone Daddy!!

Father's Day is fast approaching and I am glad that
school is out and I can create non-stop during the day.
I am turning into such a procrastinator.
I color images weeks in advance and then let them sit
for weeks until the deadline to mail the actual card is, tomorrow.
Kind of a weak ticket, but I'm working on it.

Here is my nerdy FIL's card.
I used this adorable image from Tiddly Inks.
He is available as part of the Robot Holidays set.

My FIL works for the state of California and
does something with computers. This looks just like him.
Even down to the eyeglasses to which I added 
Glossy Accents to give them some shine.
My FIL's name is Richard, but somehow I'm the only
one who gets away with calling him, "Dick".
I love that man.

Next up is the card I made for my husband.

I used a killer image from SimplyBStamps called,
Draco. He is part of her Steampunk Hallowe'en line.

I ended up adding way more spritzes than I had intended, but
I think it came out pretty cool. I used some Tattered Angels
Dragonfly mist, and then I used a bunch of Copic Toner grays
with the SU airbrush tool (it's a booger sucker, let's be real here).
Me likey.
Oh, and the Bone Daddy title I set on the computer.
It's kinda my hubby's nickname. On a good day, anyway.

Well, I have a few more cards to create today, so I had better 
get to it.