Showing posts with label mixed media. Show all posts

Monday, June 11, 2018

Tuesday, July 12, 2016

It's Party Time!!!

It's time to celebrate!!
What are we celebrating? Well, this is my very first post
for my new design team term at Stampotique Designer's Challenges.
Sounds like a great reason to party to me!!

What's a party without party guests? 
I've invited quite few of my favorite stamps to this little soiree. 
I made this altered canvas using the backside of it as a shadowbox
to give some depth and extra space for everyone. This canvas is a gift 
for a friend's 50th birthday. She's been a very dear bestie for many years. 
Like over 30 years. We actually went to high school together and have done
a lot of growing up together. I love that crazy chick. So the fact that she's
stuck around for so long means she deserves such an involved project/gift
for her old lady birthday.   

I began by using matte gel medium to adhere old dictionary pages to the frame.
Then, I used watered down brown acrylic paint to age and distress the edges.
Giving the entire a piece an ancient appearance of at least 50 years old. Hee hee.
It also allowed for a more cohesive feel to all the torn edges of the dictionary pages.
Then, I added some of my favorite stamps, 
Moth Fab (one of my very first Stampotique stamps), Schmurfy, Piling Thing,
Barkabe, and a dog from the Dog Cube.
  
This is Baby Cthulhu. He is one of my favorite Stampotique stamps.
I also managed to place the birthday definition in the background, as well.  

Over on this side we have more favorites, Karin, Batboy, Spider Girl,
more Piling Things, and a pup from the Dog Cube

The distressed and crackled chipboard number 50 is a great place for 
Moon Girl and one of the bat kids from the Halloween Cube #1 
to hang out and enjoy the festivities. 

The spider from the Birds and Bugs cube makes an appearance as well.
He is hanging freely from a web brad and some iridescent floss.
I worked the cake definition into the background up there, too.  

Kitty even decided to come out and see what all of the excitement is about.

Using the party definition in the background, I added the 
Happy, Happy, Happy banner to complete the party decorations.
Also most everyone is wearing party hats compliments of the

All of the coloring was done with Copics, and most of the images were
heat embossed on Paper Trey Ink card stock. My favored paper of choice.

My friend loved her canvas! I had to give it her a little early for fear she'd see this
post before her birthday this Friday, and ruin the surprise.
Happiest of daze to you, Dani!!! 

Thanks for stopping by today and celebrating with all of us. 
Be sure to pop by the Stampotique Designer's Challenge (now a bi-weekly challenge)
and check out all of the other designer's makes for Team 2.
As usual, there are two $30 gift certificates up for grabs this month.
And you don't even need to use Stampotique stamps to enter either. 
But if you have some already, why not break 'em out?    

I'd like to enter this canvas in the following challenge:
Simon Says Stamp Wednesday Challenge - Create a Scene

Tuesday, June 7, 2016

Alice in Wonderland Mixed Media

I have been a fan of the artwork of Sarah aka Star
for quite some time. Like many years ago when I first saw her 
Chibi artwork on the Spesch Designer Stamps site. 
Now she has her own shop selling her awesome artwork directly at
I had to grab the Alice in Wonderland images and make something 
cool with them, so I made a wall hanging that I'm pretty proud of.

I am super happy with how this turned out.
I began with a drawer insert I had that served as a perfect substrate.
I gessoed it and adhered some distressed vintage feeling designer papers. 
Then, I stenciled some diamonds on it using Finnabair platinum crackle paste,
keeping it kind of random. 

I colored up the adorable Alice image in blue greens and beige shades
of Copics. I added in some gold tones and a hint of red, too.
I matted the image onto some distressed background papers to add more texture
and contrast.  

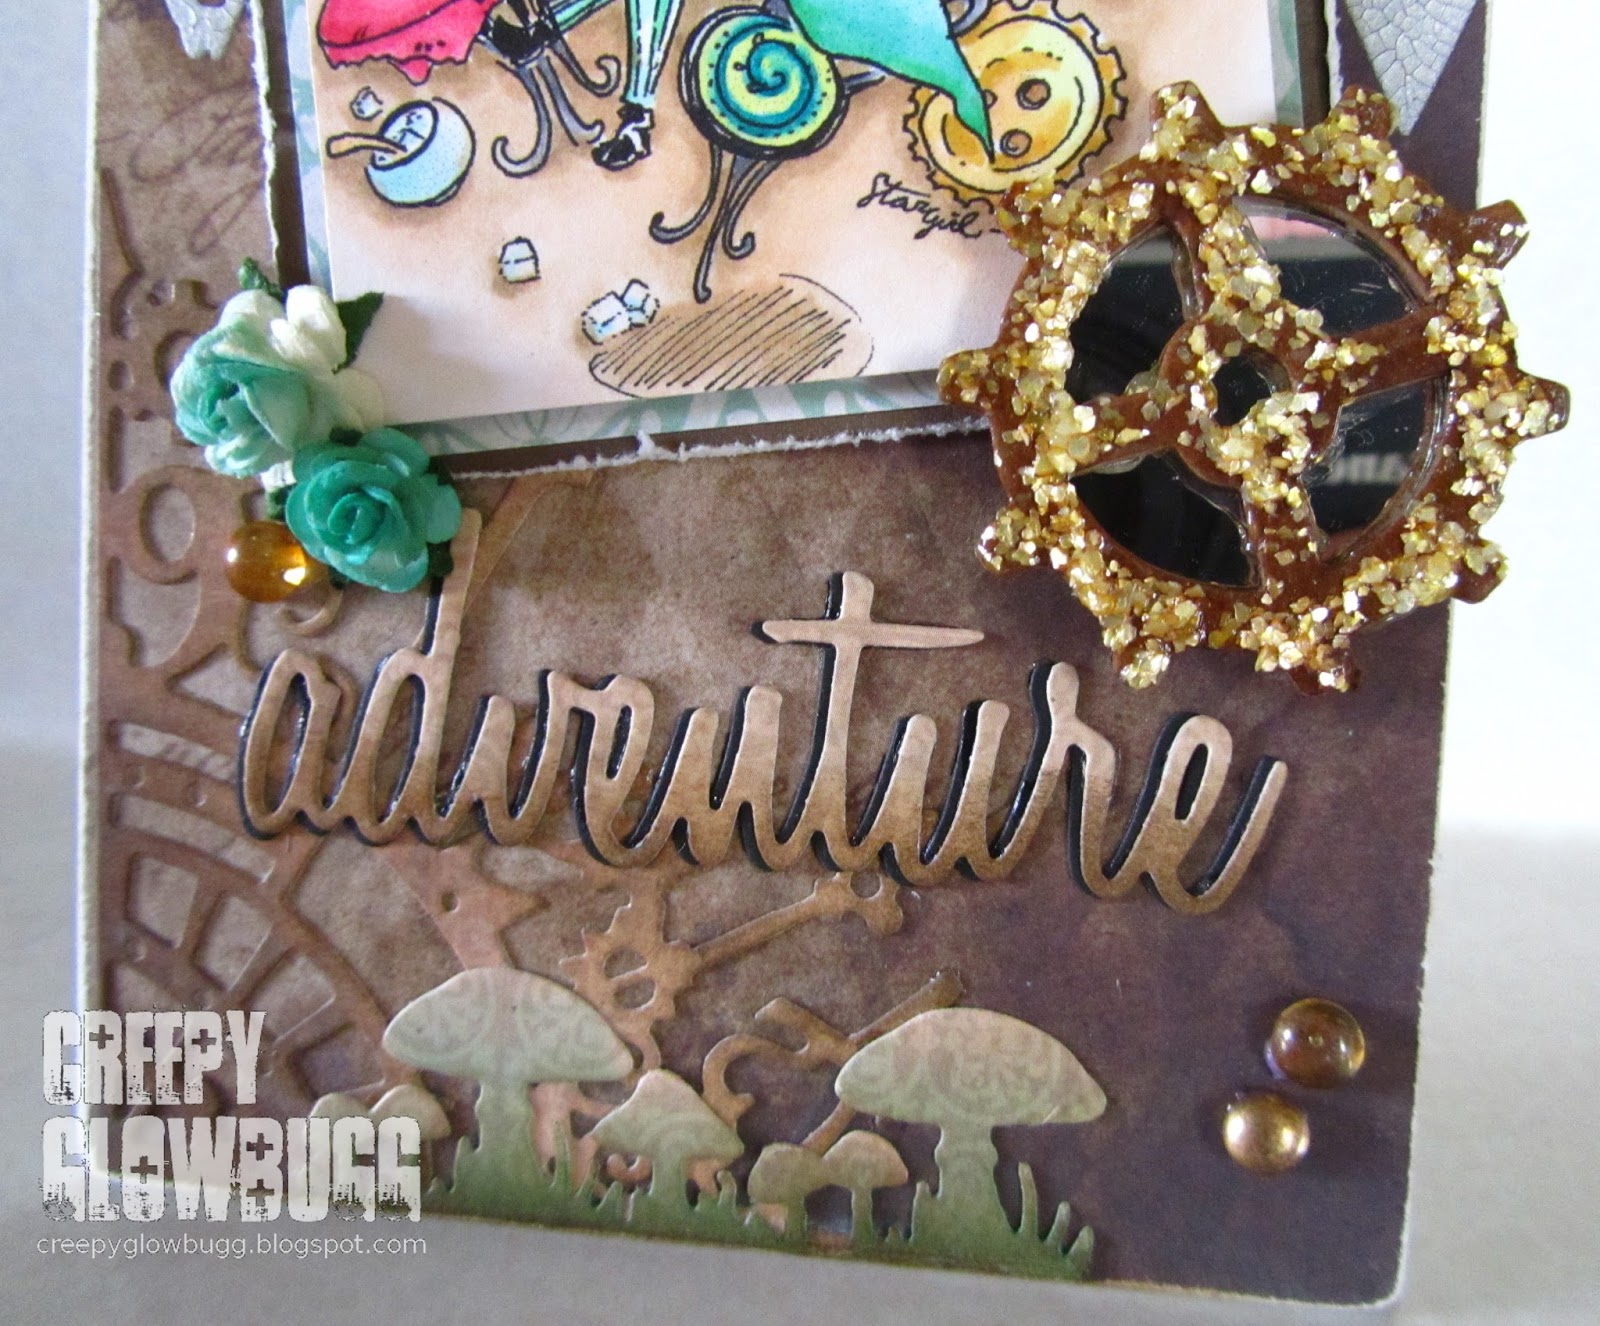
I used some metal embellishments along with various die cuts from Tim Holtz.
I covered the clock and gear die cuts with Golden Pearl Mica Flake and colored it
using TH distress inks. I also used some gold and amber shades of dew drops, 
and some hand colored paper roses in blue greens, as well.  

Then it was the Mad Hatter's turn to get some
color. More beige and blue green shades of Copic coloring.
I added some pops of red to give some nice contrast too.

More die cuts, roses, and dew drops were added to finish it all off
and provide some balance to the entire piece.
I made this for my bestie and she loves it. It now hangs in her craft room.

Thanks for dropping by today.

I'd like to enter this wall hanging in the following challenges:
hope it's not too cute for you guys


Sunday, May 22, 2016

The Evil Has Returned!!

Like a bad penny or a demonic doll, the Minions have returned
 to unnerve and amaze you with our dark spin on arts and crafts.

With nothing but tricks and bugs up my sleeve, I have managed
to create a project that has been haunting my brain space for years.
Yes, YEARS! I have been collecting, hoarding, and pilfering
bits and bobs for this particular project forever.
Ready?

I have finally created a Haunted Design House of my very own!!
Pretty fuckin' cool, right?!!

The little house started out pretty unassuming. 
I picked it up at my local thrift store, and painted it with gesso to give me a nice,
clean base to begin my wicked handy work.  

After a bit of deliberation, I opted to go with an overall crackle effect 
using DecoArt Weathered Wood crackle medium. I have hit and miss success 
with this product. You have to be very quick when applying the top paint coat,
and be sure to NOT go over the same place twice, or the crackle will not happen. 
In the end, I am pretty happy with the crackle, but was hoping for all of it to be 
perfection. Must be the Virgo in me...
The roof was created by using Golden resin sand to give an awesome texture like all
haunted houses should have. In retrospect I should have mixed black acrylic paint 
into the medium to save myself the step of painting the roof black afterward. 
Now I know for next time.  

After the roof was dry, I applied Inka Gold metallic rub in green/yellow.
I thought this would give the appearance of a rotten moss covered roof.
I added some fun plastic skeleton hands on the roof for a creepy carnival feel.
I used a heat gun to soften the plastic and shape them to look as though
they were grabbing the rooftop. I adhered them with trusty E6000. 


And now for the fun part. The embellishments! 
I had a shit ton of Halloween papers and google prints to choose from in my stash. 
Each room was carefully planned and decorated accordingly.
I used matte medium to apply all of the paper pieces.

Everyone knows that bats always inhabit the attic of every haunted house, right?
My is attic is actually a bat museum though, as the sign clearly states. 
I added a woodcut bat, some paper punched bats with clip art heads, 
and some plastic Halloween tree clippings.
I sprinkled mica flakes and glitter from Finnabair on the floor, and then decided that they
kind of looked like fall leaves, so I added some flakes to the branches as well.

The anatomy room is on the next floor. Complete with a hand painted skull,
a mummified pig fetus specimen, a vampire jaw charm, and a random bottle of gold elixir. 
Various diagrams and a brain on the floor are a necessity in all anatomy rooms.    

This room is the "Spook Show" room with spook show posters, a shiny jack-o-lantern, 
and of course some ghosties. I sprinkled some MS glitter on the floor for some sparkle.

No haunted house visit is complete without a proper palm reading.
I cut off a Barbie hand and glued it under a TH dome. I love that detail.
I used some Tarot cards and a palm reading chart to decorate the floor
and walls. And there are a smattering of spider die cuts scuttling around as well.   

The next floor houses the apothecary rooms.
This one has some fun two-headed taxidermy cut outs and more jars of schtuff. 

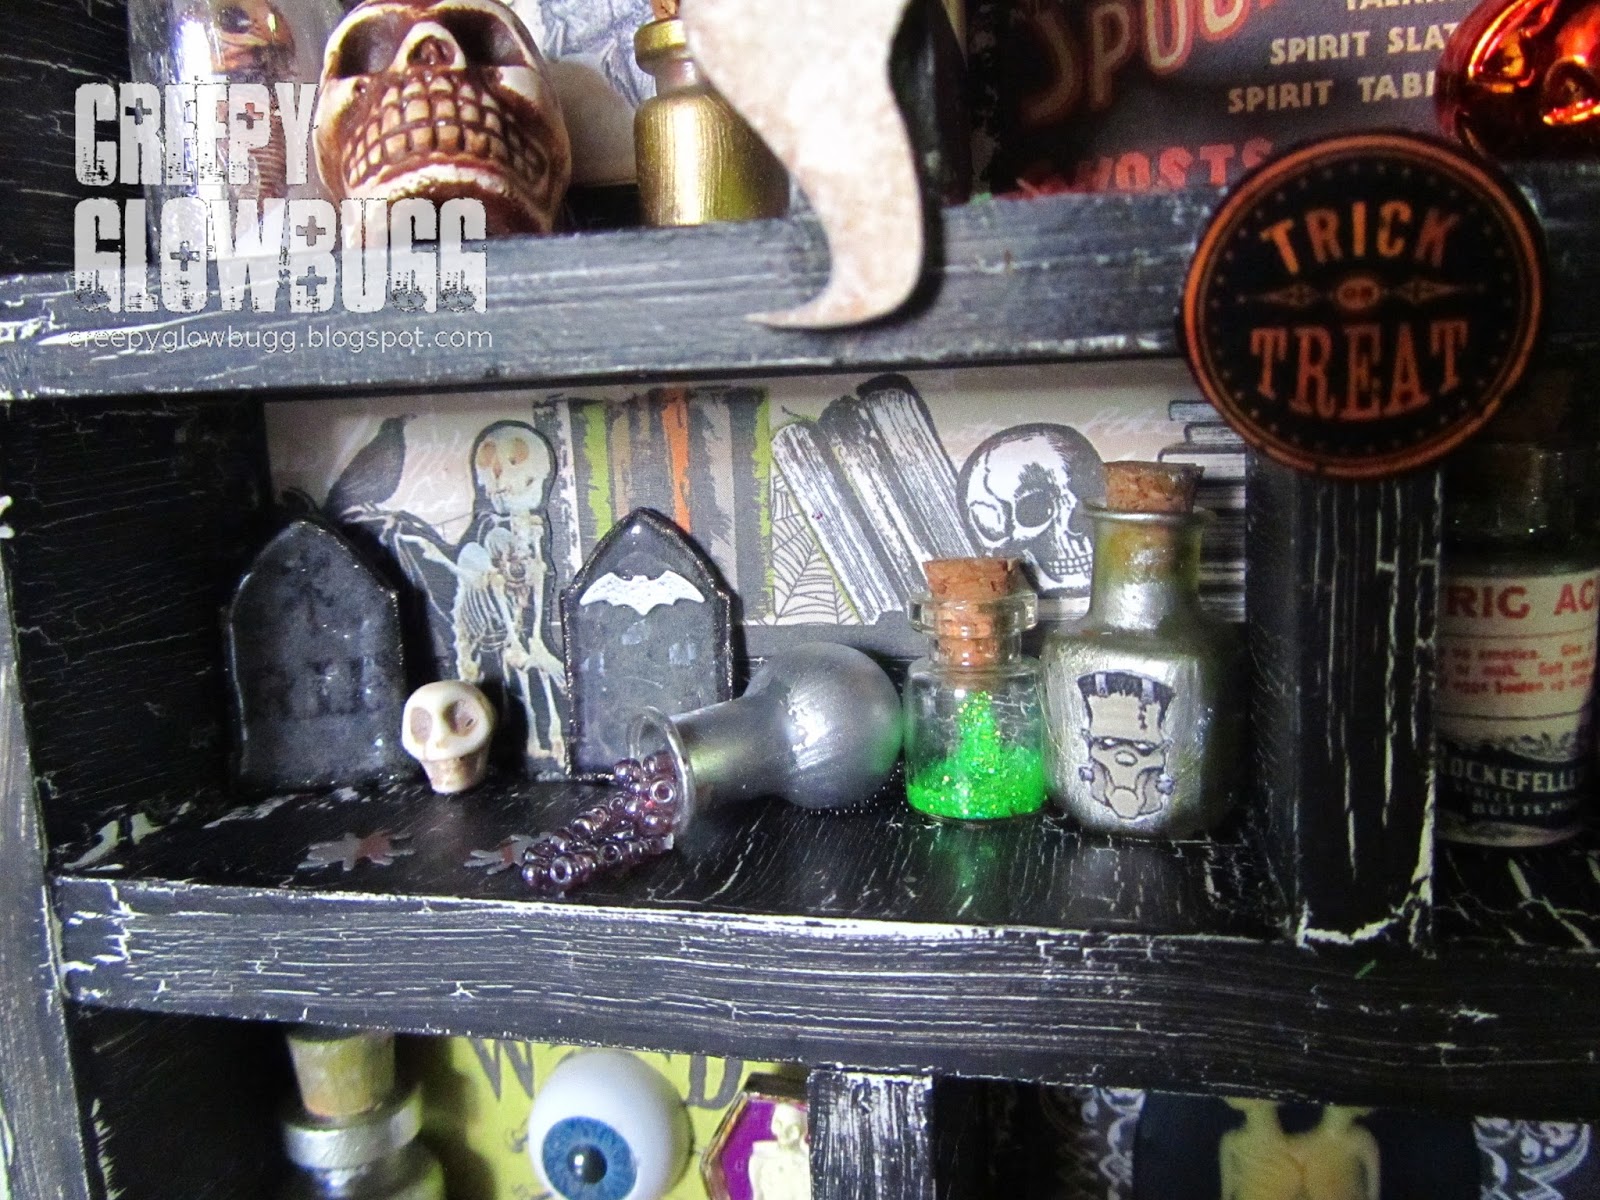
This one has some MS punched tombstones, a teeny skull, and some 
jars of monster makin's. I love how the spilled jar of microbeads looks.
I used matte gel medium to suspend the spilled beads.  

The bottom floor houses the headstones and coffins.
More gel medium and seed beads for interest.
The coffin and headstone are from Michaels miniatures that they sell 
at Halloween to go with their Halloween Town collection.  

A jar with a human eye, and a fun eyeball and crossbones adorn the 
back wall. The teeny coffin and skellie wouldn't fit in the coffin room, so it
found it's way in here. More MS glitter and spiders on the floor.  

And finally, the twins' room! 
I used a cool Siamese Twins cabochon and some left over paper cuts here.

Well, I have to say that it feels so good to finally get this creation out of my head. 
It's been taking up so much space in there!
Thanks for letting me take you on a tour. It was fun for me. How about you?

I hope you'll pop by the Haunted Design House 
to see more of what's been haunting the Minion's thoughts lately as well. 
We missed having visitors despite what the trespassing signs may indicate... 

I'd love to share this with the Dark Attic Challenges - Anything Goes


Monday, January 18, 2016

Brrrr!

For the first time in about four years, California is seeing some 
record rainfall with more rain on the way. 
Hola El Nino!
Rainy weather is my favorite time to create. There is just something so
perfect about being all snuggled up in sweats, with a hot cup of tea,
and my little space heater keeping my slippered feets all warm and toasty.
My hands are usually like ice, but that just means a warm heart, right?
Insert sinister grin here.

With 'Ice and Snow' being the new theme at the
Aurora Wings challenge blog, it seems like the right thing to do
is to create something magical, sparkly, wintry and gorgeous.

Mission accomplished!

I began my creative process by choosing my image.
I chose to work with the beautiful Elven Fairy from Aurora Wings.
I used BV and BG Copics to give her an icy look.
And lots of glitteriness courtesy of Stickles. 

I wanted to make something a little different, so I used some 
corrugated cardboard as my base/substrate. I peeled some of the top
layer of paper off of the cardboard by wetting it a bit, and peeling gently
until I achieved the look I was going for.
I used DecoArt Media modeling paste to give the appearance of snow drifts
in the corners, and along the edges. It was easy to work with and allowed me some
nice control to create my drifts. Once dried, I added shaved ice for 
some bling and iridescence. I loves me some sparkle and iridescence.

I wanted to give the idea of icy cold without the obvious traditional snowflakes.
This was harder to do than I had thought, but I have a bunch of metal accent pieces 
I have been collecting for some Finnabair inspired art that are still waiting to be used.
I found some great snowflake-type pieces and painted one with some DecoArt gesso.
I have used quite a few different gessoes, and I love DecoArt media line gesso!
Provides great coverage and nice tooth for multimedia work. I decided I needed
a bit more bling, so I added some mica medium and some hoarded iridescent gems.
A unique snowflake is born!!

I have a bunch of inexpensive paper doilies from the Dollar Store
and sprayed some using DecoArt shimmer mist in turquoise.
It took some dabbling to get a soft look, and eventually I added a
Media Mist in shimmer white over the top and that was
the secret sauce right there. Perfect shimmery, icy, and soft.
Lastly, I stamped the word, "sparkle" onto some vellum that I then tore
for yet another icy look.  I hate trying to inconspicuously glue down vellum.
But I managed to use two tiny foam circles to give height, and then used two of
my most precious (said like 'Gollum' from LoR) Prima crystals to hide the offensive
adhesives. Perfection! And all in the same gorgeous color family! Score!

I did have the forethought to cut my base at 4" x 6" so it will fit into a 
standard frame. I usually just wing it, and then suffer for my laziness later 
when trying to finish off the piece. I still haven't decided on a frame, 
but I actually have some to choose from for a change. 

That's going to do it for me today. Be sure to check out the other 'Ice and Snow'
inspired works from the incredibly talented DT at the Aurora Wings challenge blog.
Oh! Did you know that there is a DT call going on at Aurora Wings, too? 
There is a completely new team being chosen for the 
new "Stella" monthly challenge. Follow the link for all the details.  
I will say that being on the Aurora Wings DT has been nothing
but a wonderful experience. Mitzi is the absolute best to design for.
Now is your chance to join the Aurora Wings family. You wont' regret it. 

I'd like to enter this piece in the following challenges:
My new products are the DecoArt Media line of modeling paste, shimmer mists,
and gesso. I'm hooked! 


Monday, September 7, 2015

The Nights are Drawing In at HDH

Is it Monday, already?! Man, where did the summer go?
The days are starting to get shorter, and the nights are drawing in
I am so ready for Autumn! And what is the best part of Autumn?
Well, Halloween of course!

Here is my inspiration creation for the new challenge at 

I put together a mini curio cabinet from Retro Cafe Art, and painted it 
a gorgeous shade of neon purple. I  love that color! I wish I had hair that color.

Since I am so bad at taking step by step photos, this is the
next step photo I have. Ta-dah! 

After painting the cabinet purple, I applied a crackle medium,
 and then black paint as the final step. Actually, rubbing silver
Inka Gold on it was the final step.
The neon purple paint is very sheer, so after applying multiple
coats and not being happy with the coverage, I just glued a bunch
of Rock Candy loose glitter all over the back panel in each shelf.
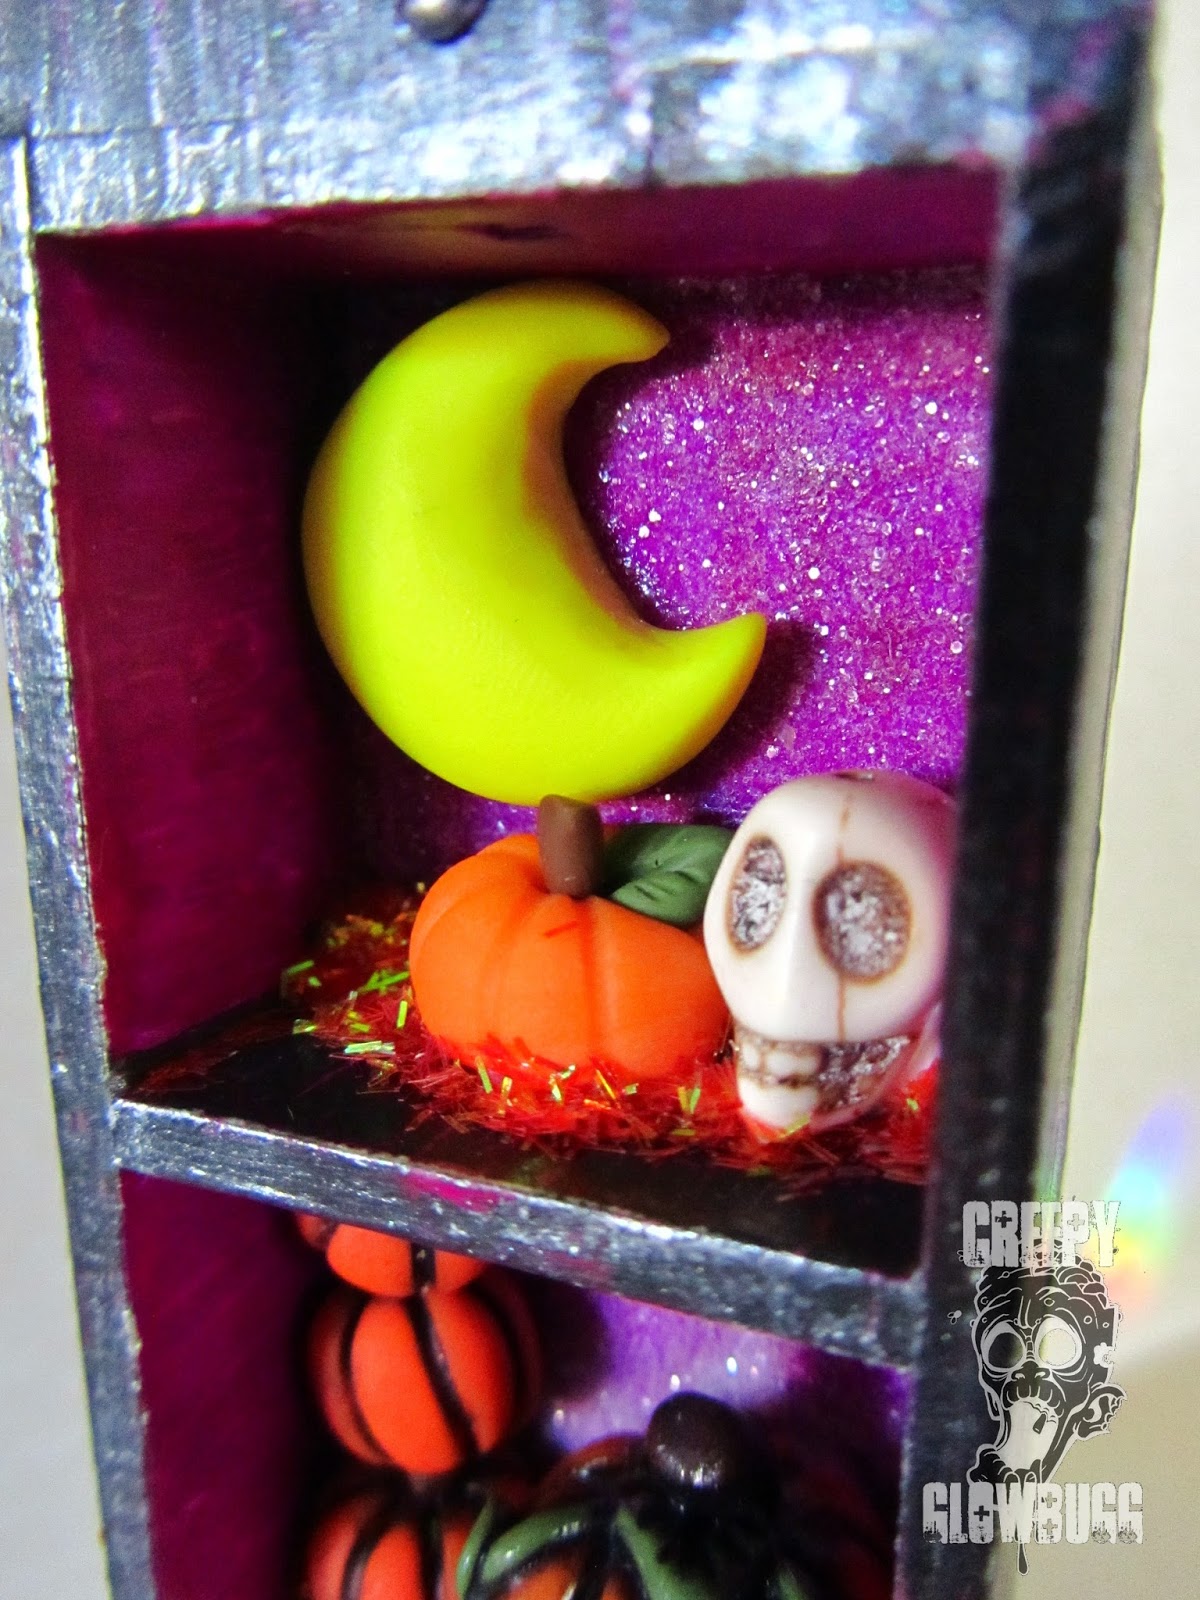
Then the fun really started! I began adding the little (mostly) handmade 
bits and bobs like the polymer clay crescent moon and the pumpkin. 
The skull is a ceramic bead. I added some fun MS glitter to the bottom
for some added interest, and to hide any unsightly glue residue. 

Here's some more of  my poly clay handy work.
I stacked the three tiny pumpkins behind the wonky eyed
fellow, and added more glitter. Reminds me of hay, a bit.

And what is Halloween without a headstone or a ghost?!
The ghostie is my creation, while the headstone is from Mike's
Halloween Town accessories. The ghost glows in the dark.

.
I painted a metal embellishment black, and then once it was dry
I added some Inka Gold in purple. I glued it to the cabinet, and then
adhered a handmade polymer clay skull and some opalescent gems to it.

Here's a nice shot of the crackle effect.
I really like the contrast of the purple and the black.

So this is it for me today.
I'll probably pop this in my etsy shop in the next day or so.

Thanks for stopping by, and be sure to check out the other eye candy

Tuesday, August 4, 2015

My very first tag for TH

I have finally mustered up the courage to enter the
I have seen so many brilliant entries for this challenge over
the past few years, and I felt as though I didn't have the talent,
or the necessary supplies to play along. Mainly the talent part.
Over the years I have acquired more TH inventory, and maybe a smidgen
more self confidence in my own abilities. 

The current tag for August is to use your die cuts in a mixed media
project. Something I rarely consider when creating mixed media is to
incorporate my die cuts. Why? I have no idea. But this particular tag
and technique really sparked my interest and mojo.

I began with two manila tags, per Tim's instruction.
One tag for the die cuts, and one with designer paper with words.
  
I layered the tags, gessoed, and sealed them, and then
the real fun started. I added Peeled Paint, Seedless Preserves, 
and Spiced Marmalade distress inks directly from the pad to the
tag in a random fashion. Then I sealed those colors and blended them 
at the same time with more matte medium. Very cool effect.  

It was at this point that I became so engrossed in this project
that I forgot to take any more step by step photos. 
I was having THAT much fun. 
I fussy cut a Found Relative lady, but since I was going for a 
Halloween/Haunted feel, I gave her a skeleton head. 
Ahhh, that's more like it. 

I added some ephemera stash of my own, but was still
unhappy with how my die cuts were showing up. I decided to add 
some distress ink in black soot with an aqua painter to the inside
of the die cuts for more contrast. Much better.
I really love how the colors came out all muddy and moody
after adding some black soot distress paint with my finger.

I attached the vial label with one of my favorite TH tools,
the tiny attacher. Such an indispensable tool!!
I scuffed the label up a bit with a nail file, and then started
splattering copper metallic and black soot paints for a speckled
effect. I love the speckled effect on nearly everything. 

Lastly, I wrapped a skull and crossbones to a metal tag
using some black wire. I used some rub-ons on the tag
before adding the charm for added interest. 
Again, I never think to use wire as a way of attaching stuff 
to my projects. So clever, and it adds so much interest to your project.  

A little warped, but here it is, my very first
tag project for the 12 Tags of 2015.
I enjoyed the challenge and the techniques immensely.  
I'm sure I'll be back next month. I'm thinking how cool an 
entire book of these tags would be to create and show off
to all my friends. Or maybe just to use in my art journal.
The possibilities are endless.    

I'd like to enter this tag in the following challenges: