Friday, August 6, 2010

Simply Betty Release Hop - Victorian Beauties **2nd post today**

**This is my 2nd post of the day. If you are looking for the HDH Fiendish Friday, please scroll down.**

If you are here for the hop fresh from Eulanda's eye candy,
then you're in the right place!

Today is the day!
The Simply Betty Stamps new release hop is here!
{Please start the hop with us at the beginning on the above linked Simply Betty blog}
Betty is releasing the most amazing images for her "Victorian Beauties" line today.
She was such a doll and invited the Burtonesque Dolls to join in with the Simply Betty DT to debut these beauties. Thanks Betty! These images are some of my favorite to date! They are so fun to color and create with!
So, without further ado....

I'd like to introduce you to Mina and James
I knew immediately that I wanted to hang these two like old fashioned portraits, and I wanted to use my vintage wallpaper to act as a wall upon which to hang them. I was going to put them both on the same card, but couldn't find a pleasing juxtaposition of the two pieces together, so I made each one a separate card.
I chose to go with black and white to color both images to keep 'em looking vintage. I didn't think a sepia tone would look right with the accent color. I added red to both for a cool pop of color. I think it has a real Gothic or even a horror feel to it. I'm really diggin' it!
I was going to color their eyes red also to lend to the idea that they were vampires, but decided against it, this time.
I used some Steampunkish cog and wheel embellishments on his card, and just added some small roses for hers.
I mounted everyone on oval nesties (they come as a full length image) and voila!

Please stop by the Simply Betty Stamps website and pick up these digital images.
There are six glorious images to choose from, or get them all at a fabulous price!
 Betty is running a great sale with an even greater cause in mind.
 She is donating 50% of her sales of these images to the Ronald McDonald House in her area.

That's it for me. Thanks for hopping by.
 Now hop on over and visit Jen, as she is next up with something incredible to show you!   

Thursday, August 5, 2010

Fiendishly Fun Friday: Kitties, frogs, and zombies, oh my!

Barb? Anything?


Okay, I am something of a night owl.
I rarely go to bed before 3AM, and I am usually working on my DT duties, 
or more than likely, I am blog surfing (blurfing?).
I find all kinds of cool stuff, and I get especially excited when I find cool
blogs like izombielover.  

This image really spoke to me, as it involves two of my favorite things,
Kermit the Frog, and zombies!
Jeremy of iZombielover is quite an artist, and has put a unique twist on what I consider to be pop art.
He manipulates digital images to make them odd or creepy (he can do pretty stuff too, if you're into that). He has some gorgeous black and white images!
He also does request work, so if you have an idea he can make something really 
unique and amazing for you.
Please check him out at  jmhdigital.com.
"Art is the key to the soul, zombies attack the brain..."


And now, another kitty..... 
Have a great weekend!
Keep it Creepy!

Tuesday, August 3, 2010

TBD #14 Victorian Beauties

The Dolls are extra excited this week because we are working with brand new images from our very own Betty and her ultra fabulous Simply Betty Stamps! This new digi line is called Victorian Beauties and is just perfect for Burtonesque-ing! Your mission this week is to create a card/project using any female Burton character and giving her a Victorian make-over!
This is "Mina".
I probably would have picked her just cause she has a cool name, but once I saw the little skullies on her dress and hat, I knew she was the digi for me. 
 
I even got flowery and flourishy on this one.
Seems fitting for the Victorian Beauties.
I think they used flowers like we use deodorant these days.
Man, can you imagine the 'aroma' from wearing all of those layers and bustles, in an
unairconditioned world?
Um, eeew.

Join the Dolls this week for our challenge.
Simply Betty is giving away a sweet prize! 
The Victorian Beauties images will be released and available for purchase at Simply Betty Stamps later this week, and the Dolls have been invited to participate in the Release Hop on August 6th! Woot woot! So be sure to join us at the SBS Blog on Friday for more fun and chances to win the new digis!


Monday, August 2, 2010

HDH050 Foul Flutterings

Foul Flutterings.
What to do? What to do?
 
I know!
I will take this totally innocent and adorable cupcake from
The Greeting Farm, and make him a zombie cupcake.
A zombie cupcake with purpe wings!
And a skull for a cherry on top! 
And my favorite moon paper.

My work here is done.
Drop by the Haunted Design House and see what the other Macabre Minions have cooked up this week.

Thursday, July 29, 2010

Fiendishly Fun Friday: Transformer Owl

Glittered Acetate tutorial

I love colored glass, stained glass in particular.
When I first saw this technique that is immediately what came to mind.
I had grandiose plans of making some incredible stained glass images, but I have found that some images work better than others with this technique.
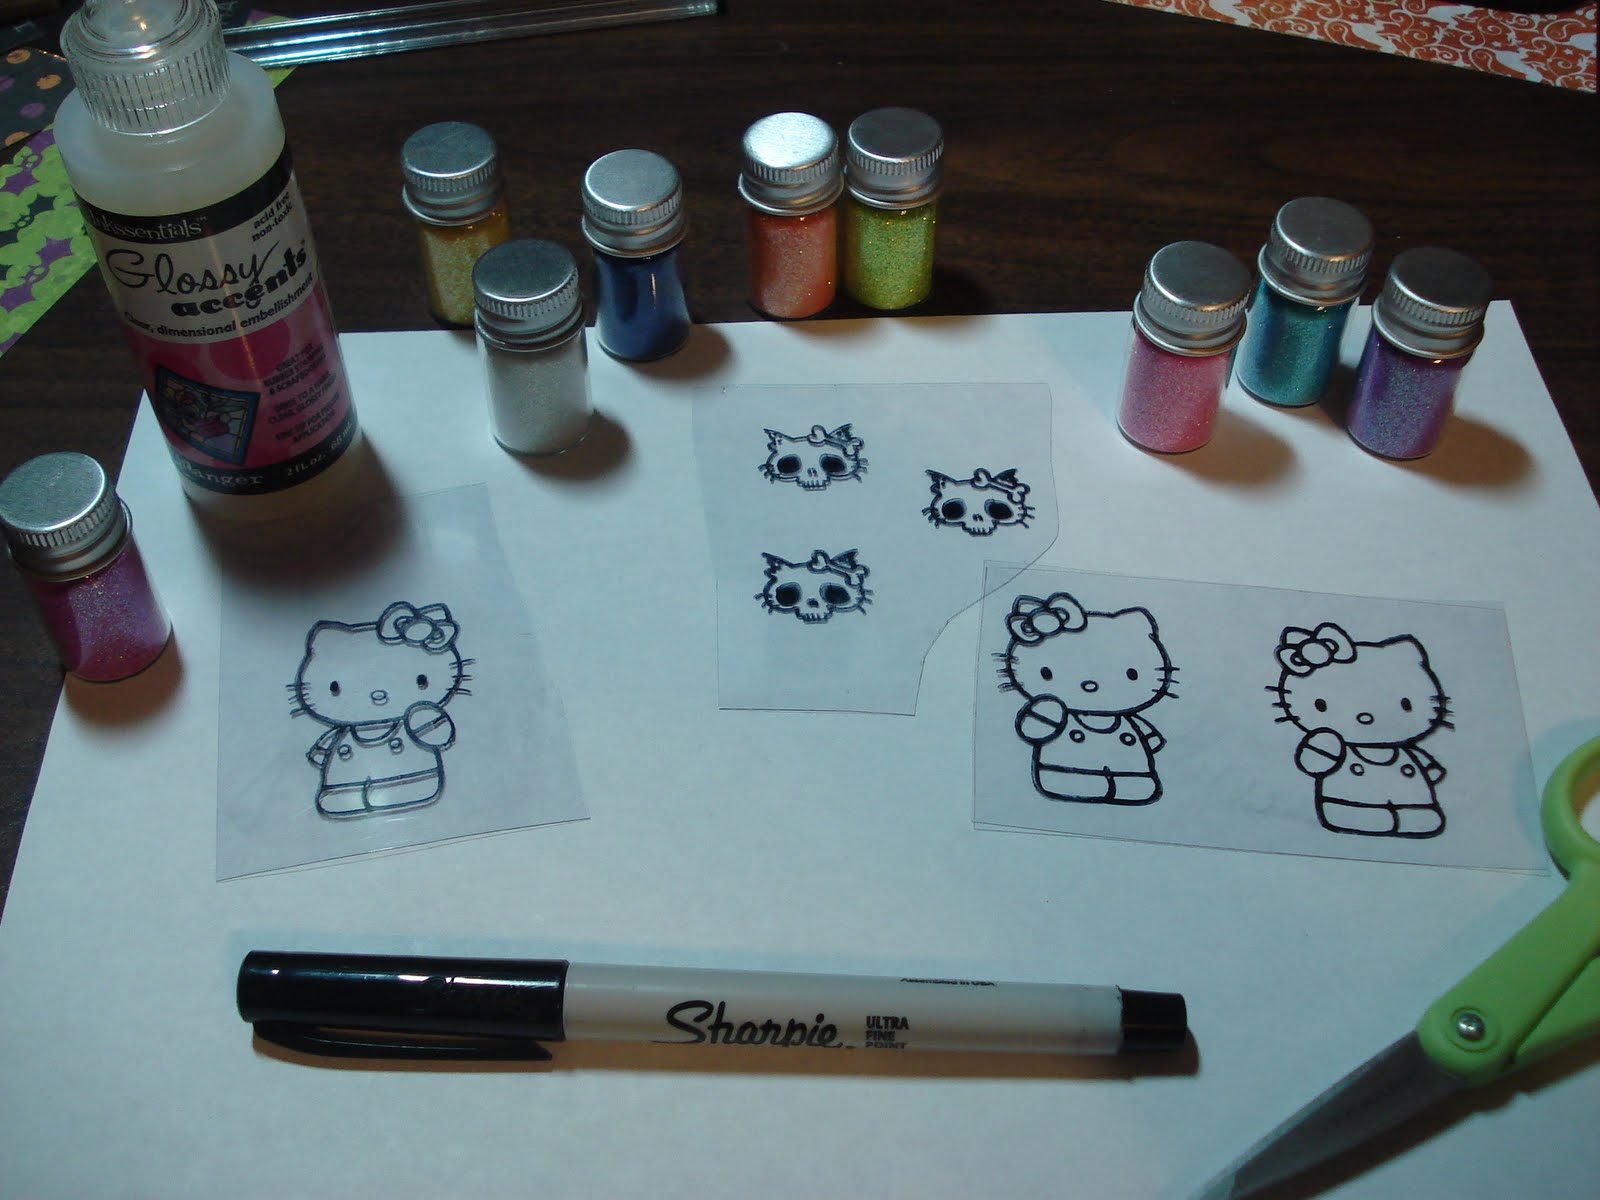
For my very first tutorial, I chose this simple Hello Kitty image from StampitCrazy.
I used StazOn ink and a sheet of acetate I found in my craft room. You can use any kind of acetate from overhead transparencies to the backing from stickers.
I've got all of my goodies out.
I have chosen my glitter colors (Doodlebug), got my Glossy Accents, scissors, and an extra fine Sharpie to fill in holidays (blank spots) in the stamped image.
Once you have stamped your image with StazOn and let it dry completely (about 3 minutes or so), flip it over and start putting Glossy Accents on the reverse side of the image where you want your first color.
I have colored her bow and shirt orange first.
I like to let the glitter sit in the Glossy Accents for a minute or two to give it time to soak in and give a more solid appearance, before I dump it back into the jar. I also hold it up to the light to see if there are any light spots that still need to be filled in.
I use a small paintbrush to remove any excess glitter before I add the next color. 
Adding white for her face and feet and hands.
Sometimes it is hard to keep the GA and the glitter confined to a small space.
No worries, just let it set up for a few minutes (not dried all the way though), and use a push pin or needle tool to carefully push the glitter and GA back into the desired space, or remove it completely and try again.
Finally, I add the black glitter for her overalls, and I let it all dry for at least 15 to 20 minutes.
Once it is all dry, you can carefully trim it out, and using either more
Glossy Accents, or another strong wet glue, adhere it to your project for lots of glittery gorgeousness!
Thanks for stopping by and if you decide to try this fairly simple technique, I'd love to see what you made!

Tuesday, July 27, 2010

Stamp it Crazy Anniversary

This month marks the one year Anniversary for the
Barb is also celebrating her Birthday, her husband's Birthday, and their
2nd wedding Anniversary.
Being the generous gal she is, Barb is offering up a ton of blog candy just for 
celebrating with her (and making a card using SIC stamps).
 
Even though I relish the creepy side of life, I am huge fan of the Kitty.
I have been a Kitty worshipper since I was about 8 years old.
I used to steal quarters from my Grandma and go to the Hallmark store and buy
Hello Kitty, My Melody, and Little Twin Stars crap all the time.
My Grandma was a waitress, and she kept quarters in a dish in her bathroom(?), so I'm assuming she just thought it was the commode spirits taking their share.
I digress...
Barb has this great stamp of Hello Kitty and I used it to make some really cute Halloween cards for the less gruesome of my friends.
I used this technique of stamping on acetate and using glitter and Glossy Accents to fill in the color.
{Tutorial to follow tomorrow.}
One wasn't enough.
Two still wasn't gettin' it.
Aaahhh! Third time is a charm!

Happy (belated) Birthday to Barb, and
here's to many more Anniversaries to come!